Review

Fold-a-Cover G4 Elite for 3rd gen Toyota Tacoma 2016-2020


C0070.jpg

After a lot of research, I’ve finally decided on a tonneau cover for the Tacoma. The one that I went with is the Fold-a-Cover G4 Elite.

For those who have never seen this product before, the G4 Elite is essentially a hard folding tonneau cover but there are a few things that make this one stand out. First, this cover features a four-panel design. Many of the other hard folding covers on the market only feature three panels. Having four panels mean that each individual panel can be smaller and when everything is folded up, the cover takes up less space and allows for more usable bed space.

This cover also allows for the ability to access the truck bed without needing to lower the tailgate. On the front and rear panels of the cover are latch release handles. Just lift these and the panel comes right up. This is an extremely useful feature and is one of the main reasons why I purchased this cover.

C0072.jpg

Another useful feature of this cover is the ability to lock it independently from the truck. On the front and rear panels are covers that reveal a lock. Use the keys that come with the cover and you’ll be able to lock this cover in place. This in combination with a locking tailgate will provide you with a pretty safe place to store your things.

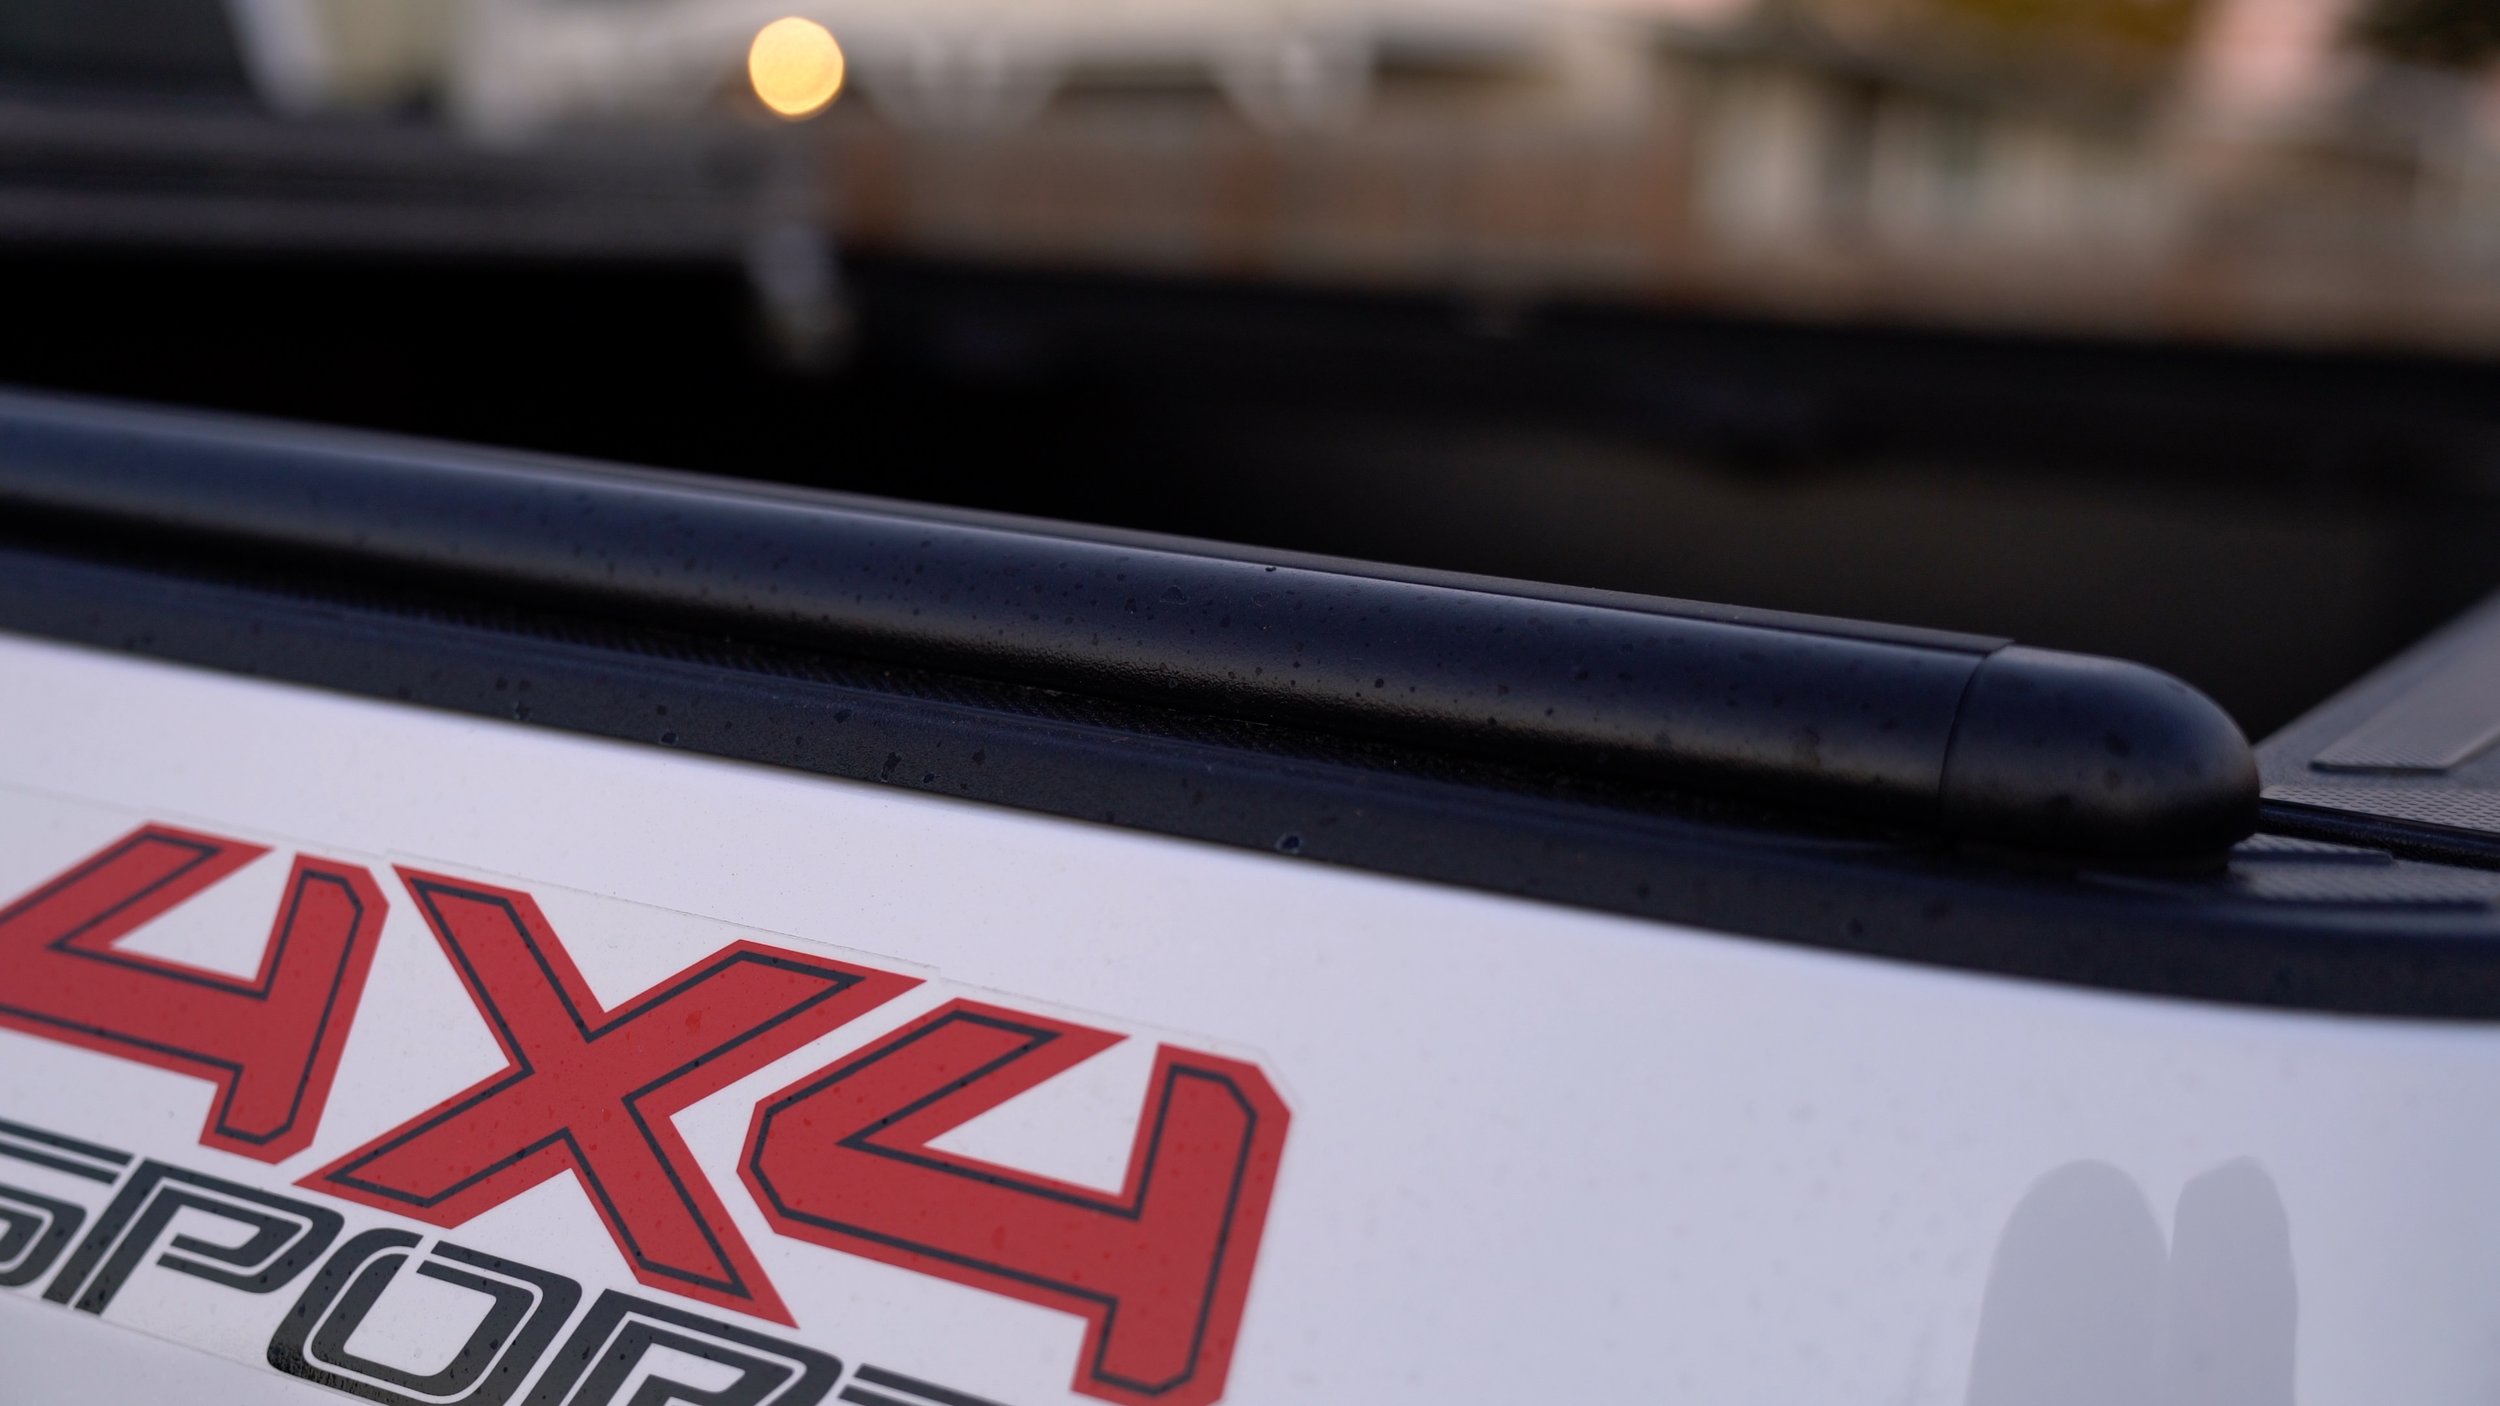
The last big thing that I’d like to point out with this cover is that it uses what Fold-a-Cover calls the wind seals. These are essentially two plastic strips that run along the entire bed rails. When unfolded, the panels actually sit in between the wind seals rather than directly on top of the bed rails like many other tonneau covers. The wind seals have weather stripping both where the panels sit and where they meet with the bed rails. Fold-a-Cover doesn’t explain why they took this approach but the way that I see it, because there is one solid weatherstrip with the blade seals, this design theoretically can provide better weather resistance. With other covers that fold and sit directly on the bed rails, there are typically cuts wherever the panels fold so that it can more easily articulate. In theory, these cuts make a break-in the weather stripping and can allow water to slip in. Overall, I would have to say that the G4 Elite’s design has worked so far because I haven’t seen any water seeping in from the sides of the cover.
C0083.jpg

And that, in a nutshell, is the G4 Elite from Fold-a-Cover. I’ve only owned this cover for a short time so I can’t attest for its long term durability. However, in my time with the cover, I’ve noticed a few things that I’d like to share with those who are interested in picking this product up.


IMG_1757.JPG

Let’s get started with my first impressions of the G4 Elite. Well, let’s just say it wasn’t very good. The shipping box arrived ripped up with the staples that held it together torn apart so it was only staying together by the wires that wrapped around the entire box. Going inside, everything was still there but the cover itself was slightly damaged. There were a lot of small paint chips and scratches on the cover. I don’t think that this is a result of shipping. Sure, the smaller parts could’ve moved around and rubbed against the cover, but I think most of the damage was there before the cover even left the factory. Some of the damage definitely looks like it was from mishandling while others just look like a bad paint job. My overall first impressions were not great. For something that MSRP for $960, I’m not impressed. Had it not been the beginning of the rainy season and I needed a cover ASAP, I would’ve sent this thing back. And a word to the wise, if you are a stickler for a flawless product, do not install the cover right away. Make sure that you thoroughly inspect it because once installed, Fold-a-Cover will not take it back. I contacted Fold-a-Cover about this issue and the best they could do is send me some touch-up paint so that I can fix the damaged areas because that’s exactly what I wanted to do with a brand new bed cover that I spent almost a grand on (sarcasm).

C0091.jpg

Next, let’s move on to the install. I installed the G4 Elite on a 2019 Toyota Tacoma Double Cab Long Bed. There are various versions of this cover that will fit 2nd and 3rd gen. Tacomas, but I can only speak for my 2019 model. Let me just say right off the bat that this is the hardest bed cover that I’ve ever had to install. That’s not to say that the directions are overly hard to follow or the install itself is very difficult, but relatively speaking, it is much harder to install this cover than others and it definitely took the most time to do so. With other covers, there are a few brackets to install, put the cover on and you’re pretty much good to go. With the G4 Elite, there’s a lot of minor things to adjust and a lot of going back and forth to make sure that once you lock one thing down, the other side doesn’t move and is still good. There’s a lot of finagling with this cover and that can be quite annoying but again, the install is still manageable. However, there are a few things that I’d like to point out about the install process. This section is really only helpful for those doing the install. I’m not giving you a step by step but if you’re going through the directions, you should know exactly what I’m talking about.

IMG_1761.JPG

One thing that was really throwing my install off was the front blade seal. This is essentially a weatherstrip that helps to prevent water from coming into the truck bed. The problem with this is that it is too long on the sides. The weatherstrip actually wedged itself against the front edge of the wind seal and does not allow the front panel to close.

Examine the included image. The blade seal (red) is too long and wedged itself against the wind seal’s endcap (green) and doesn’t allow the front panel (blue) to close properly. This leaves a gap that allows water to enter the truck bed.

To fix this, I trimmed off a small piece of the blade seal with a razor blade, just enough to allow it to clear the wind seal’s endcap.

Earlier I mentioned that one of the reasons why this cover is harder to install is because it requires a lot of adjustments. One of those things that took me a while to finalize is the rotary latch. With this, there are three things to consider: the latch’s position, the striker bolt’s position, and the latch’s timing. The latch and striker bolt have to be positioned so that the latch can catch the striker bolt and properly close the cover. If the latch is too far forward/backward, the striker bolt won’t engage the closing mechanism. The same goes if the striker bolt is too high/low. The panel may close but it won’t seat properly and may leave a gap in the wind seal. With the latch’s timing, this refers to the opening of the left and right rotary latch, relative to each other. If the timing is off, you’ll distinctly hear the latches open one after the other instead of in unison. This adjustment is fairly straightforward but took me a long time because I was really trying to get the two latches to sync up. The adjustment is done by tightening/loosening a few nuts which adjust a cable on the end panels. If you lift the latch release handle VERY slowly, you’ll be able to hear the individual rotary latches release one after the other. By doing this, you’ll be able to figure out which latch is releasing first, but it is still very difficult to adjust it so that they release at the same time. It is possible but difficult because there is such a fine line between one latch opening first or the other. Again it is possible to get them synced, but I’ve found that once you go to tighten the cable end jam nut, the cable slightly shifts and the timing is out of sync again. I would recommend that you don’t focus too much on the slow latch release method. Instead, lift the latch handle release like you normally would. With a smooth motion, the latches will release so quick that the timing will be indistinguishable. That is if you get the timing relatively close in the first place.

C0081.jpg

The thing that took me the longest time to finalize was the position of the wind seals. These were difficult to adjust because they are largely locked into place and there isn’t much room for adjustment. They are held in place by brackets that bolt into the bed frame and rails. Fairly straightforward but I’ve found that being just a tiny bit off with its placement will prevent your cover from closing properly. If you look at the brackets that hold the wind seal in place, you see that most of them are held in place by a bolt going through a hole so their position is largely set to one place. The only elongated holes are used on the brackets that mount the wind seals on to the bed. The elongated holes theoretically allow you to move the wind seals from side to side to allow the cover’s panels to fit in between. For me, the front of the wind seal kept on coming in too close against the cover so it wouldn’t close and latch properly. Even pulling the wind seal out to its maximum position didn’t help. Whenever I would tighten the bolts that held the wind seal in place, it would pull the wind seal towards the cover panel and that’s no good. I ended up shimming a few flat washers under the bracket that held the wind seal in place so that it sits higher. This way when the bolts get tightened, there’s relatively little movement from the wind seal. With other bed covers, they typically have weatherstripping along the entire edge of the cover panels and once the cover is closed, that weather-stripping compresses and prevents water from coming in. Because the Fold-a-Cover utilizes the wind seals, you have to worry about 2 extra parts that I feel just overcomplicates the install process. The panel compresses against the wind seal’s weatherstripping, then the wind seal itself compresses against the bed cap. The install would go so much more smoothly if Fold-a-Cover just does away with the wind seal completely and mount the cover directly to the bed caps.


C0091 .jpg

Now, let’s just talk about everyday use and the practicality of this cover. One of my main reasons for getting a bed cover is to keep the contents of the truck bed dry. That being said, no cover is going to be waterproof or keep 100% of the water out. Most manufacturers, including Fold-a-Cover, will say this about their covers.

C0086.jpg

It’s rainy season here in Washington and this cover has been seeing a lot of rain. So far, the G4 Elite seems to be able to keep out a good amount of rain. I haven’t seen any penetration from the sides. The only places that get some water are the corners but this is to be expected. The Tacoma’s bed itself isn’t very well sealed. There are some noticeable gaps in the corners and I’m sure this is where water is coming in from. So, water getting in the bed is not so much the cover’s fault but the Tacoma. One thing that you can do to help reduce this problem is to get some truck bed weather-stripping/seals and just stick them in those gaps at the corners. 

C0077.jpg

Another thing on the wetness, prior to purchasing this cover, I saw a few reviews that mentioned that the locks would freeze up in winter and become unusable. When I got my G4 Elite, I found this hard to believe because the locks have some pretty robust covers that seemed to seal pretty well and actually takes some effort to open. Unfortunately, it didn’t take long for me to realize that those reviews were actually correct. Either the cover doesn’t seal that great or there’s some other factor involved because there always seems to be water and condensation under the cover. Of course, in winter this will result in the locks freezing up.

C0093.jpg

I’ve also noticed something similar happening to the latch release handle and the entire lock housing. After a rainstorm, if I were to open the panels where the latches are, there will be noticeable amounts of water draining from the latch housing. This would mean that water is seeping in from the latch handle itself. Again, there’s a good chance that this can freeze up in the winter, making the cover completely unusable. With the amount of water that gets into this housing, I’m really interested in seeing how long it will last. Only time will tell.

Another problem that I have with this cover is the blade seals. I think that they are too short in width, especially on the tailgate where it is barely and unevenly distributed. You would think that I can just pull the entire cover slightly back but I can’t. Remember, the cover’s placement is largely set because it’s bolted into place with little adjustment available. Fold-a-Cover just needs to include a longer blade seal on these covers.


C0090.jpg

Overall, I would say that the Fold-a-Cover G4 Elite works pretty well after you get it installed. It looks good and largely functions as advertised. It’s just the amount of water that gets under the lock cover and lock assembly that’s kind of concerning. If you live in a relatively dry location with little precipitation and freezing temperatures, I think that this is a good option.


Want to support my work?

Consider visiting the shop and buying "Absolutely Nothing"
https://www.HaiHoangTran.com/shop/absolutely-nothing

or

Become a Patron!
https://www.patreon.com/HaiHoangTran

or

PayPal
https://www.PayPal.me/HaiHoangTran


*UPDATE* I got a 2020 Toyota Tacoma TRD PRO


If you’ve been keeping up with my content, you’d know that I recently purchased a 2019 Toyota Tacoma TRD Sport. This was supposed to be the purchase of my obtainable dream car but the entire experience turned out to be a disaster. In short, I was scammed by the dealership. They sold me a damaged truck as new. But we’re not going to go too deep into that. I’ve already made a video dedicated to the situation and I’ll link that for you to check out for yourself if you’re interested.

Today, I’d like to give you an update on the situation. Well, if you’ve read the title then it’s pretty obvious. I was successfully able to get rid of the TRD sport and I am now in a brand new, off the delivery truck 2020 Toyota Tacoma TRD PRO.

Now, this is not a review post for the 2020 TRD Pro. That will be coming very soon so make sure to subscribe to my YouTube channel for that! Today, let’s just talk about how I got here.

First, let’s do a quick recap. Within days of ownership of the TRD Sport, the driver window had malfunctioned and didn’t roll up all the way, there was rust on the frame, there was damage to the bumper, along with a number of other things that dealt with false advertisements in terms of what the original dealership was selling. After discovering all of the various problems that my TRD Sport had, I immediately contacted the dealership where I purchased it from. The dealership fixed the window but did not want to be accountable for anything else. They actually told me that they had not inspected the vehicle prior to selling it to me, so they can’t verify were the damages came from. Well, you would think that that is a major red flag right there and that alone would be enough for them to step up and admit some fault. But no, this dealership put all the blame on me.

C0101.jpg

After this, I took advantage of my platform and made a YouTube video. Many of you commented with various suggestions. One of the more popular suggestions was to contact the corporate offices of Toyota USA. Long story short, they were not going to do anything. All corporate could do was tell the dealership to contact me in an attempt to try and resolve the situation. But the way that this works is that corporate files a claim, the dealership gets the claim and has to respond. Well, the dealership replied to corporate and said that they contacted me and the situation was resolved when in fact, they did no such thing. At the end of the day, all corporate can do is suggest to the dealership that they should do something about it, but they don’t force them to do anything. Many of you commented that corporate was very helpful in fixing your situations but I cannot say that for myself. I don’t know if this is just how it is now, but corporate had no power over a situation like mine and that’s a big shame. They are giving way too much power over to the dealerships and some bad dealerships are just out here ruining the Toyota name.

Another popular recommendation from you guys was to utilize my state’s Lemon Law. It seems like most of the people who recommended this just misinterpreted my situation or Lemon Law itself. I felt that Lemon Law didn’t apply but I contacted some of the biggest Lemon Law lawyers in the state anyways just to cover my basis. Of course, they also believed that this case would not apply so they weren’t going to take it on. If multiple people who do this for a living aren’t willing to take the case then that’s pretty much a wash. The next option was to contact some contract lawyers to possibly claim breach of contract or just get a general lawyer and sue them in any way possible. I also looked into this but didn’t fully commit myself to this route because I knew that it would’ve dragged this situation out even longer. It took weeks to even find the right lawyers and then it would likely take months to get anything resolved. I just didn’t want to invest the time with this, I had a life to live outside of this problem.

At this point, I had largely given up on the situation. Then one morning, I woke up to a few different emails. One was from a representative of Toyota USA and the other from a representative of Toyota of Olympia, another local dealership. Both parties had seen my video and wanted to do whatever they can to help. I spent the entire day working with these people and ultimately got what I needed from Toyota of Olympia.

They straight up asked me what they could do to help. I told them that I didn’t want the TRD Sport anymore. I originally wanted a 2020 Tacoma but didn’t get it because my original salesman told me that they wouldn’t even be available until January 2020 so there’s no point in waiting and if I bought the 2019, they’d give me a deal on it. Not wanting to wait another half a year, I jumped on the offer. But wouldn’t you know it, right after I bought the 2019, the 2020s started rolling into their dealership. I’m pretty sure now that this was a blatant lie and wasn’t a misunderstanding on the salesman’s part because I was later briefly shown the dealership’s inventory system and they know months ahead about incoming cars. They know when a vehicle will be built and are given an estimated arrival time. The salesman either does not know how his own dealership operates or straight up lied to me. You be the judge.

Anyways, I was given the opportunity to get a new truck. For this new one, I knew that I wanted a 2020 Tacoma. But since I had to go through this entire ordeal, I wanted to see what Toyota of Olympia could do to sweeten the deal a bit and how can you sweeten a Tacoma up any more than getting a TRD Pro? The top dog of the Tacoma line.

C0100.jpg

I spent a few days communicating with Toyota of Olympia working out all the small details and I now own this, the 2020 Toyota Tacoma TRD Pro. I love this thing. I know I said that the TRD Sport was my dream truck, but I more so meant the Tacoma in general. I have a strong connection to it because this is the vehicle that I most associate with my dad. Being able to own one myself is just another way of remembering him. That being said, this TRD Pro blows the TRD Sport out of the water. It is an insane upgrade.

Funny enough, at the time when my original video hit about 130k views, other parties started to contact me. The vice president of Cilajet contacted me to apologize for what happened and to see how he could help. I want to make it clear that although I mentioned Cilajet in my original video, they did nothing wrong in this situation. It was just a matter of the finance manager falsely advertising the product to get me to buy it. He sold Cilajet as something completely different than what it is. I just wanted the people of Cilajet to be aware of this in order to possibly prevent a similar situation from happening again.

Surprisingly, I even got a call from the dealership that I purchased the TRD Sport from. One of the managers called to see how they could fix this situation. I told them that another dealership was already getting me in a 2020 TRD Pro and the only way that they’d be able to solve the problem was to get me in the same vehicle at an even exchange. If I had to spend any extra money, I was not going to be giving it to the people who scammed me in the first place. I’d rather give it to the people at Toyota of Olympia who wasn’t even involved and went out of their way to make sure that I was happy. After explaining my wants, the manager told me that he had to ask his higher-ups. Then there was a lot of waiting. Every day I had to check-in and ask if there was an update. Day after day, nothing. Then a week later, they wanted me to come in for a meeting. I thought that this was it, we’re finally going to end all of this. It turned out to be the complete opposite. I met up with the dealership’s general manager and it was like this guy had no common sense or the ability to read the situation. He came off the bat confrontational and stayed there the entire time. This shouldn’t have been surprising at all because I’ve actually seen this guy at the dealership before. The last time that I was there, he got into a screaming match with another customer. The customer was saying how the dealership owed him a bunch of money. One of you guys actually commented that you had a terrible experience with this general manager too and I completely understand it. Clearly the general manager has a history of bad customer service and from my personal experience, it’s because he’s just not a people person. So to have someone like this lead your dealership is quite troubling.

C0105.jpg

At the end of the day, their offer was just insulting. This along with the bad service that I had received and continue to receive, there was no way that I was doing business with them. The general manager actually told me to get the f*ck out of his dealership so that kind of tells you how things are run there.

I was going to give them a chance but this just turned out to be a huge waste of time. Since immigrating to the US, my family has been doing business with this dealership for about 20 years and bought a number of cars. If things could be saved, then that’s great. But I can tell you now, I will never do business with this particular dealership again.

I left the lot and called Toyota of Olympia right away and told them we were on. The Super White TRD Pro came to their dealership the following week and I picked it up.

I’m loving this vehicle right now. It’s not only everything that I could ask for in a Tacoma but it also represents closure. It’s a symbol that this entire ordeal is over. I can now move forward and enjoy my truck.

However, not everything is perfect with this transaction. Being that I had the TRD Sport for some time and really didn’t think that the situation was ever going to be resolved, I bought some accessories for it. Accessories that do not work with the TRD Pro. I originally wanted a Tacoma with a 6ft long bed and that’s what I got with the Sport, but the Pro only comes with a 5ft short bed. This, of course, means that the Sport’s tonneau cover (Fold-a-Cover G4 Elite) will not fit. So, it is now for sale. If anyone is in Washington state and want to buy this cover, hit me up and we’ll work something out. Use the included contact form to reach me.

Aside from that, I can’t tell you how happy I am that this entire ordeal is over. I no longer have to look at the TRD Sport and am reminded of the bad experience but can look at the TRD Pro and remember everything that went into getting this truck.

And for this, I have a few people to thank.


First, to all the employees of Toyota of Olympia who got involved (there are a few) and took the time to contact me and ultimately resolved this entire situation. Based on the comments of my last video, there’s quite a few of you out there who think that all dealerships are the epitome of evil and I’m telling you, if you’re in the area, give Toyota of Olympia a chance. They’ve exhibited above and beyond customer service and provided me with the best overall experience that I’ve ever had with a dealership. They contacted me and tried to help even though it had nothing to do with them. They actually took a loss in helping me when they bought my TRD Sport back at full price. Above all, they told me that they weren’t helping in hopes of getting anything out of it. They didn’t ask me to promote their dealership or anything like that but I will because I had that good of an experience with them. If you are looking to buy a Toyota on this side of Washington, definitely check out Toyota of Olympia. The best customer service provided by some of the best workers, bar none.

Lastly, I want to thank every one of you guys who watched my original video, liked it, shared it, and commented. You guys brought a lot of attention to the video and helped me get it to the appropriate people. Thank you, thank you so, so much. Words cannot explain how grateful I am for what you guys have helped to accomplish because, without you, there is no way that anything would’ve been done. No one even contacted me before the video hit 100k views. That in itself is a problem. Looking at some of the comments that you guys left, it would seem that this is not a singular event. Similar things and even worst has happened to you guys when working with a dealership. This is a major problem. People are being ripped off and there’s little that they can do about it.

If I’ve learned anything from this situation, it’s to make yourself be heard. Spread the word as far and wide as possible. Let everyone know what happened and bring attention to the people who have wronged you. It’s not going to be easy. It’s not going to be quick. It took me months to get the attention of anyone. There were a lot of unanswered emails, a lot of disregarded phone calls, a lot of time spent sharing my experience wherever I can. Be relentless. Remember, this is your money on the line. You worked hard for it and you deserve to get what was advertised and what you paid for.

Thank you, again, for all the help. Now that this is over, I hope to bring you a lot of great future content, especially those with the new TRD Pro.

C0106.jpg

Want to support my work?

Consider visiting the shop and buying "Absolutely Nothing"
https://www.HaiHoangTran.com/shop/absolutely-nothing

or

Become a Patron!
https://www.patreon.com/HaiHoangTran

or

PayPal
https://www.PayPal.me/HaiHoangTran

Lowe's / Kobalt "Lifetime Warranty"

A few years ago, I purchase a Kobalt ratchet set from Lowe’s. At the time, it was advertised to have a lifetime warranty. I was told that if the set were to stop functioning properly, I can just take it back and get a new one. If you go to the Kobalt website, this warranty is still in effect.

“You should never have a problem with your Kobalt tool. However, if you do, return the item to the place of purchase for a free replacement. No questions asked.”
— https://www.kobalttools.com/guarantee

Well, after years of use, the ratchet set no longer functions at 100%. Some of the teeth on the sockets were worn and rounded. They would often slip and damage bolt heads. I figured, since it was covered, I might as well try to take advantage of the lifetime warranty.

I took the tool set back to Lowe’s and ran into my first problem, the toolset was no longer made and wasn’t even in Lowe’s system. I was told that there wasn’t anything that they could do for me and that I would have to contact Kobalt.

497CDC97-CA12-4622-BC9F-847E518BB13F.jpg

I went home and did just that. Unfortunately, it didn’t get me anywhere because Kobalt told me the same thing, but about Lowe’s. Kobalt said that they couldn’t do anything because I bought it at Lowe’s and only Lowe’s can replace it. They would have to give me a voucher or deal with it another way.

So, it was back to Lowe’s. I explained what Kobalt said and this time, Lowe’s took a little more initiative. Funny enough, the ratchet set now shows up in their system. The problem now is that it was showing up with the clearance/closeout price when the set was last in the system. When I purchased the set, it was $30/$40. The latest suggested price was $9.99 and this is what they offered me. There’s something that they didn’t make clear at the time of purchase, that the value at the time of warranty claim is determined by the current/final value of the product. So in my case, the product lost possibly 75% of its value and I had to take that cost rather than the companies involved taking initiative, understanding the situation and take it upon themselves.

At this point, I really had no choice. What I had wasn’t working so keeping it wouldn’t do any good. I was willing to take the $10 but even this wasn’t straight forward. It turns out you don’t just get that credit towards something else, you have to get the most comparable product. Because I had a 14 piece ratchet set, I had to get another 14 piece ratchet set. There was no option to move up/down, no option to get another type of tool, not even if I was willing to pay for a more expensive product. Just think about it, what kind of backward thinking is that for a company? If someone is willing to spend more, let them! It’s increasing your profit! Well, getting something similar proved to be impossible to do because no such thing existed. Instead of trying to work with me to get something I actually wanted, they really went out of their way to get me something that doesn’t exist.

Because they didn’t have the set at this particular Lowe’s, now it was time to see if anyone else did. Their system showed that another store had one in stock. As someone who’s worked in retail and understand how inventory works, I knew that the one displayed as available didn’t exist. It may have at one time, but it is more than likely that the inventory count is just wrong. The associate who was working with me knew this too but his manager was adamant about contacting the other store and making them look for it. This wasn’t surprising considering that the manager was giving push back throughout the entire process and seemed to not want to help me warranty this product out at all. She really made it a lot harder than it should’ve been. Anyways, the associate contacted the other Lowe’s and guess what? They didn’t actually have it in stock. Shocker.

Well, now we’re just back to where we started. At this point, the manager had no choice but to just give me the $10 towards something else. Again, it’s $10. I should’ve been given the full amount that I paid. I took the $10 and they still went out of their way to try and not give it. I bought another tool and that was that.

So what did I learn from this situation? Well, Kobalt tools may have a lifetime warranty, but it’s going to be one hell of a process to try and use it. My case is a bit different because my tool is no longer made, but this is something that should’ve been expected. I doubt that Kobalt plans to produce any one of their products for the rest of the company’s existence so they should expect to deal with some out of production warranty claims and this process should be a lot more straight forward. Customers should be given credit equivalent to what they paid and they should be able to use this credit towards any new Kobalt tool. Don’t force the customer into the same thing. I mean, if it malfunctioned on them in the first place, they may not even want it anymore so why force it on them?

There’s something else that I want to note. My original socket set actually came with a “Sockets for Life” guarantee. This means that if I were to lose a socket, I can contact Kobalt and I’d be sent a new one. How would they do that in this situation? These sockets are no longer made. Would I get something different? Would I be out of luck? These are not questions that I should have to ask. The guarantee/warranty process should be a lot more transparent and straight forward.

Needless to say, I’m now a lot more weary of the Kobalt brand in general. I now question all their warranties because I don’t know if I’d actually be able to take advantage of them when the time calls for it. This makes me think that the lifetime warranty is just marketing fluff to help sell more products. I actually like Kobalt tools and have been using them for years. But after this experience, I can’t say that I’ll be purchasing any more.


Want to support my work?

Consider visiting the shop and buying "Absolutely Nothing"
https://www.HaiHoangTran.com/shop/absolutely-nothing

or

Become a Patron!
https://www.patreon.com/HaiHoangTran

or

PayPal
https://www.PayPal.me/HaiHoangTran

Sirui Swift P1 First Impressions

I’m excited to bring you another exclusive first look at a soon to be released Sirui product. I recently received a pre-production unit of the Sirui Swift P1. This is an electronic gimbal and I would classify this as one of those do it all gimbals because it’s designed to work with a variety of devices. This gimbal can be used with mobile phones, mirrorless cameras, compact cameras, and even comes with an attachment to mount actions cameras like a GoPro or something similarly shaped. The P1 has a max load of 900g/1.98lbs so it should be able to accommodate a decent sized setup.

ASSASSIN_S005_S001_T026.jpg

Typically for something brand new like this, I like to do an unboxing to give you guys an idea of what to expect but like I said, I received a preproduction unit which came with no packaging or paperwork. All the pieces were crammed inside of a soft carrying case, which according to what I’ve seen is not the official case that buyers will receive. Everything was also packed inside of a box made for something else so I didn’t think it was worth showing and possibly confusing anyone.

That being said, because my P1 didn’t come with any manuals or other information, today I’d like to just give you a first impression of this product and go through it to the best of my abilities. Everything that I’m expressing will be based on my time playing with the P1 and the information that I’ve been able to find on the internet. I’m sure there will be things that I’ll leave out but it is what it is. I’ll just have to play with this thing, wait for some more information to be released and then I’ll be able to come back with a proper review. So, let’s get started.

If we look at the design of the P1, it looks very similar to the Sirui Swift M1 that I recently showcased. The big difference is going to be the exclusion of the folding design of the M1 which minimizes the size for travel. To be honest, I’m glad that the P1 doesn’t include the folding design. If you saw my M1 video, you’d know that I’m not a fan of it and actually think that it’s flawed. The P1 may be a bit bigger when not in use, but I’d rather take that trade off to save myself from the headache that is the M1’s folding design.

Sirui Swift P1 First Impressions.jpg

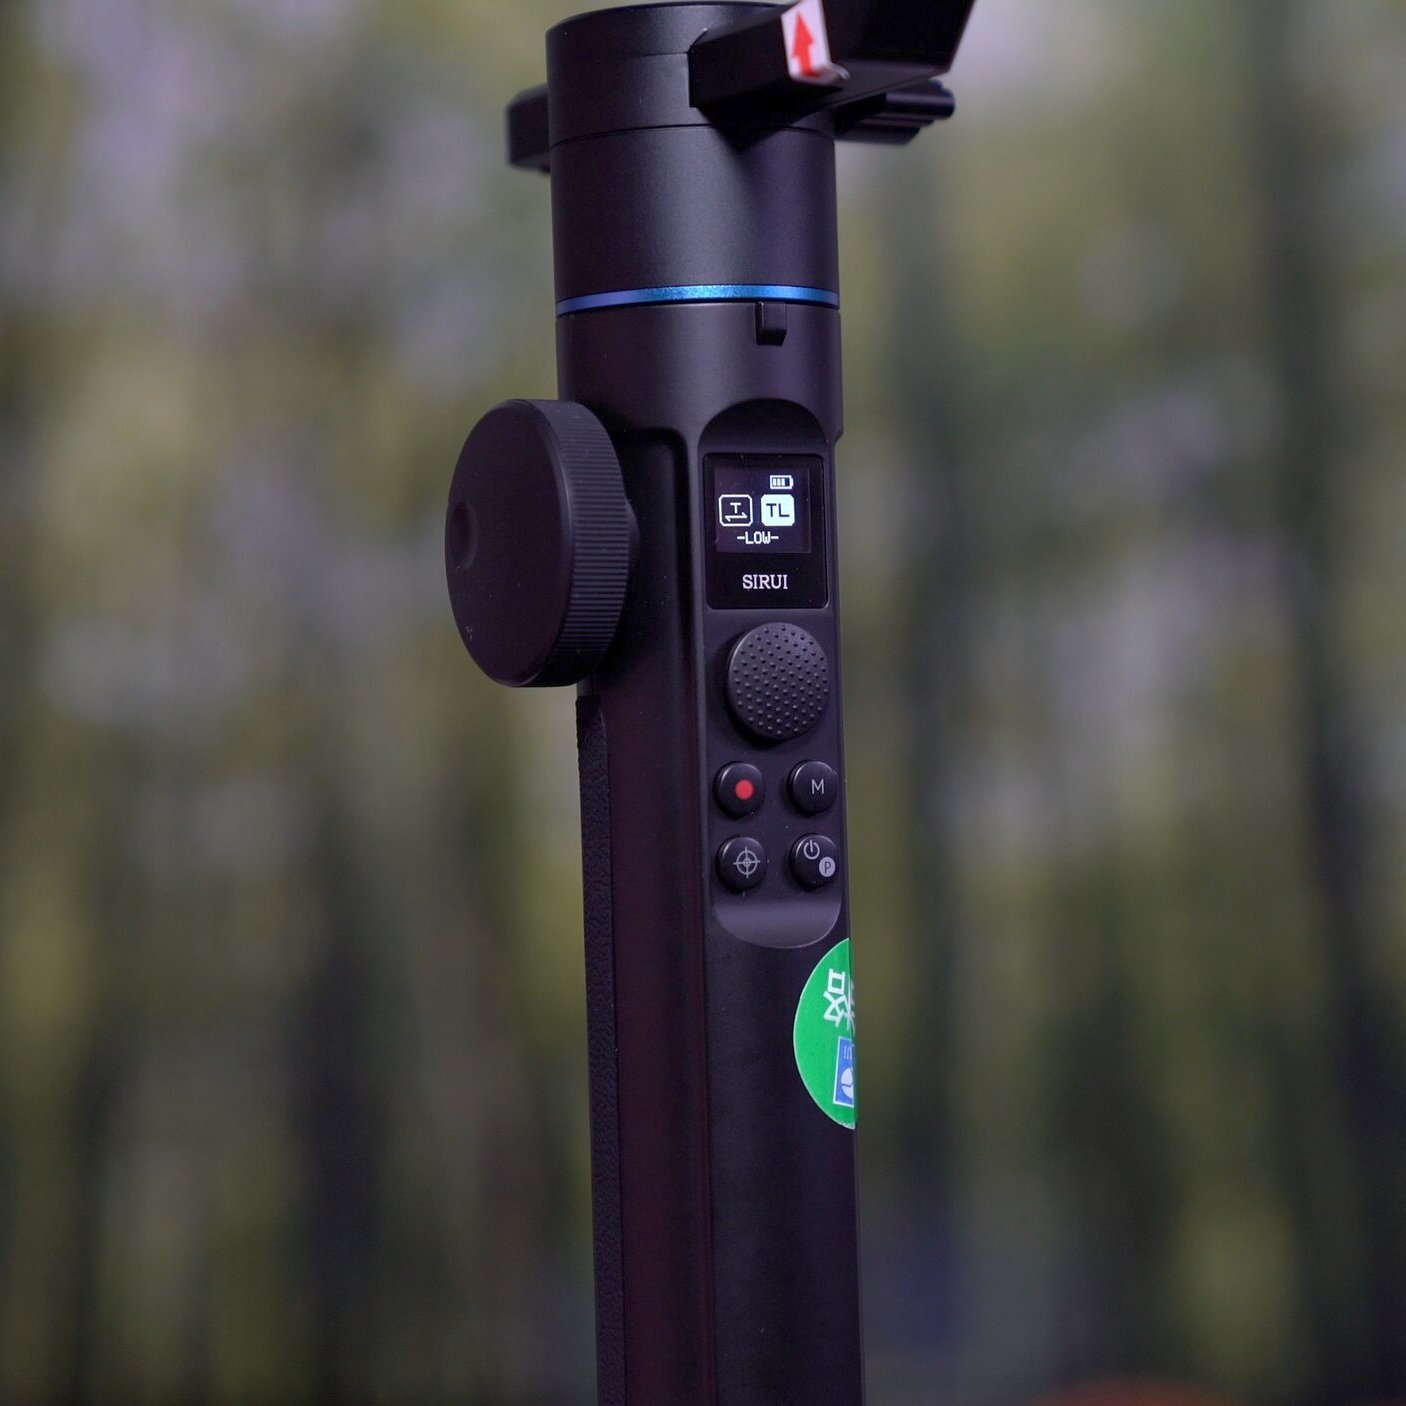
Looking at the handle, we get a nice display that shows the bluetooth connection status, battery life and current modes/settings.

Under the display is a joystick which allows for the manual control of panning and tilting of the gimbal along with some function buttons.

Of these function buttons, we first have the shutter button which is pretty self explanatory. It activates the shutter and takes photos or start/stops recordings.

Next is the mode button which switches between the various gimbal modes. With the P1, we get Tilting-Following Locked mode which locks the tilt motor while allowing use of the roll and pan. Next is Tilting-Following mode which is the same as the previous but now also unlocks the tilt motor to allow for complete freedom of movement. Third is the Triaxial Tracking Locked mode which locks all motors to the current orientation. Last is POV or Roll Follow Mode. This basically tilts the camera carriage up in preparation for inception or vortex mode.

ASSASSIN_S005_S001_T012.jpg

Moving on, we have the Focus Button. When connected to a compatible camera, this allows you to activate autofocus.

Lastly, we have the Power Switch button which not only turns the gimbal on/off but also doubles as the Motor Force Switch. If you double-tap this button, you’re able to select between 3 power settings of motor strength: low, medium and high. At the moment there’s no information as to what each setting is good for so you’ll just have to play with it to find the best setting for your camera setup.

On the side of the gimbal is the Auxiliary Wheel Dial. This allows you to adjust various things based on the mode that it’s in. Aside from spinning the wheel, you can also press it to cycle through its modes. Based on my experience with the Swift M1, I would assume that this first mode allows you to zoom in/out and set manual focus but it currently doesn’t do anything, at least not for me. With this wheel, we are also able to pan and tilt the gimbal.

ASSASSIN_S005_S001_T017.jpg

Moving to the back of the handle, we have the last of the physical buttons. This is a rocker style switch with two separate buttons, one on top and the other below. Pressing the top button activates sport mode where the motors become more powerful and allows for the gimbal to move faster than normal. This is useful for doing things like whip pans or just tracking a fast moving subject. The bottom button acts as a hotkey to activate Tilt Follow mode in all modes except when the gimbal is already in Tilt Follow mode. In which case, the bottom button activates Lock Mode. Double tapping the bottom button resets the gimbal’s parameters.

And that is basically all of the functions of the Sirui Swift P1, at least for now. Again I received a pre-production unit so it’s currently lacking some features but I have no doubts that after a few firmware updates, everything will be ready to go when this gimbal ships to consumers.

So far, this seems to be a pretty decent gimbal. It does what it's supposed to and has everything that I need for my personal work. Also, at the price of $200, it is also cheaper than some of the competition so that will be a big draw for this device.


UPDATE

After receiving a PDF of the Swift P1's manual, I'd like to amend some of the information expressed above.

  1. The packaging/accessories that I received are not those that consumers will receive when the P1 actually ships. My pre-production unit was shipped prior to when the official packaging was finalized.

  2. The Auxiliary Wheel Dial's first mode is Zoom mode. It does not adjust zoom and focus as stated, just zoom.

  3. The Motor Force Switch's 3 motor levels are as follows: "high force movement for heavier cameras, medium for mirrorless cameras small or general in size, low level for card cameras. Lower the force movement level if the Gimbal with the equipment attached vibrates when powering up. Increase the motor force to improve stability."


If you’d like to learn how to balance/setup the Sirui Swift P1, check out this video!


Want to support my work?

Consider visiting the shop and buying "Absolutely Nothing"
https://www.HaiHoangTran.com/shop/absolutely-nothing

or

Become a Patron!
https://www.patreon.com/HaiHoangTran

or

PayPal
https://www.PayPal.me/HaiHoangTran

APS iArmor Running Boards IA20SJE8B for Toyota Tacoma

After a lot of frustration with my Tyger Star Armor Side Steps, I decided to take them off and it was time for something new. Well, my new running boards have officially arrived and they are the APS (Auto Parts Specialists) iArmor.

It should be noted that some places list the manufacturer as APG. I can’t confirm if the APG running boards are the same as the APS but from images, they do like indistinguishable.

Installation of these running boards is very simple. If you go under the car near the door’s edge, you’ll see that there are some plastic screws. These are simply covers for the running boards’ mounting locations. Just take them off and you’ll be ready to install the running boards. There are 6 covers per side. The iArmor running boards come in three main pieces, two that make up the brackets that attach to the truck and the running boards that attach to the brackets. Three brackets attach to either side of the truck and each bracket is labeled to indicate its position on the truck. These are the first things to install. Each bracket is held in place with two sets of bolts that are provided. I would suggest 2 things while installing these brackets: use a rubber washer between the truck and the bracket to prevent damage from vibrations and to use threadlocker to prevent the bolts from loosening over time. Once you get the 3 brackets in place, it’s time to mount the running boards. Just align the running boards to the previously mounted brackets and clamp everything in place with the either half of the bracket and provided bolts. Once all 6 bolts are tightened, you’re done with one side and just repeat on the other.

I went with the APS iArmor running boards for a few reasons. First, they look pretty mean. At first, I wasn’t sure about the square tubing and sharp line design because the Tacoma doesn’t really feature any of these things. The Tacoma has a very round body shape. But I have to say, these running boards look very good. I was especially attracted to the way that the parts of these running boards are flushed against each other. Everything is streamline with few noticeable welds. This gives the iArmor a clean look.

Another thing that I like about these running boards is that they made out of aircraft grade aluminum. The manufacturer claims that the material corrosion proof which is great. I shouldn’t have to worry about the boards for a long time. Another benefit to using aluminum is the weight. These things are very light weight. One person can lift and install them with little hassle. Less weight also means that there is less that the truck has to haul around and this equates to better fuel economy. But in this case, less weight does not mean that the boards are less functional because they still have a weight capacity of 300 lbs.

One thing that I like about side steps, in general, is their potential to protect your vehicle from adjacent vehicles while parked. If you have a wide enough side step, it’ll stick out a decent way from your doors and if someone were to open their door, there’s a chance that they’ll hit the side step and this will prevent damage on the finish. The iArmor running boards are 6.5” wide so they should provide some form of protection.

I’d like to point out a few things about these running boards for those who are interested in picking them up. First, I don’t think that they are a good choice for those who need something lower to step on because they can’t get into the truck. These running boards sit about an inch lower than the rocker panel so they don’t make much of a difference. They are going to be best for those who want a larger surface area to step on to help them get in the truck, but these people will need to have the ability to get into the truck in the first place.

Another thing that I’d like to point out is the potential low quality of the running boards. Prior to buying, I read a few reviews that mentioned that the hardware that came with the boards (nuts and bolts) actually rusted over time. One person noticing rust within weeks. That’s quite concerning considering that the boards mount to the outside of the truck and it’ll no doubt experience some water. I don’t know the validity of these claims but I’ll be able to see for myself pretty soon. It’s rainy season here in Washington so my iArmor running boards will be exposed to a lot of rain. I’ll be keeping an eye on all of the hardware on these running boards over the next few days, weeks and so on. The bolts that I’m most worried about are the ones that mount directly into the truck because if those rust, they’ll spread into the body and that will be no good at all. From what I’m seeing, it seems like only the running boards themselves are made from the aircraft grade aluminum and everything holding it in place is spray painted steel so they all have the potential to rust. We’ll just have to see how the running boards perform in the long run.

For me though, the most disappointing thing about these running boards is general quality control. The boards that I have mounted to my truck is not the first set that I’ve ordered but the the second. The first set arrived damaged because of the way that they were shipped. Both boards are put in a box wrapped by a plastic bag with no extra form of protection. While in transit, the boards rub and bang against each other causing scuffs, scratches and even paint chips. Sending the first set back and getting the second set didn’t solve anything because the second set had the same issues. This is a problem from the factory because they don’t take the proper measure to package the running boards for shipment. So, if you’re the type to really care about minute details, these are not the boards for you. Look somewhere else.

To be honest, I would’ve returned these running boards had I not been offered a decent partial refund to cover the damages. For the price that I got them for, it was worth keeping but knowing what I know now and if I had to pay full price, I wouldn’t buy them. They look good, but the likelihood of receiving a damaged product and potential for rust is not worth the long term headache. Again, for the price that I paid, I can go buy a can of spray paint and make sure that all surfaces are covered and protected. You just have to figure out if that’s something that you potentially want to deal with.


If you're considering on buying any of the products mentioned, please support my work by using the links below.

APS iArmor Running Boards
Toyota Tacoma Double Cab https://amzn.to/2ODjZpk
Toyota Tacoma Access Cab
https://amzn.to/2mSbgnq
https://amzn.to/2lfBn77
https://amzn.to/2lfWd6m
For other vehicles https://amzn.to/2MqQVi0


Want to support my work?

Consider visiting the shop and buying "Absolutely Nothing"
https://www.HaiHoangTran.com/shop/absolutely-nothing

or

Become a Patron!
https://www.patreon.com/HaiHoangTran

or

PayPal
https://www.PayPal.me/HaiHoangTran