Photography

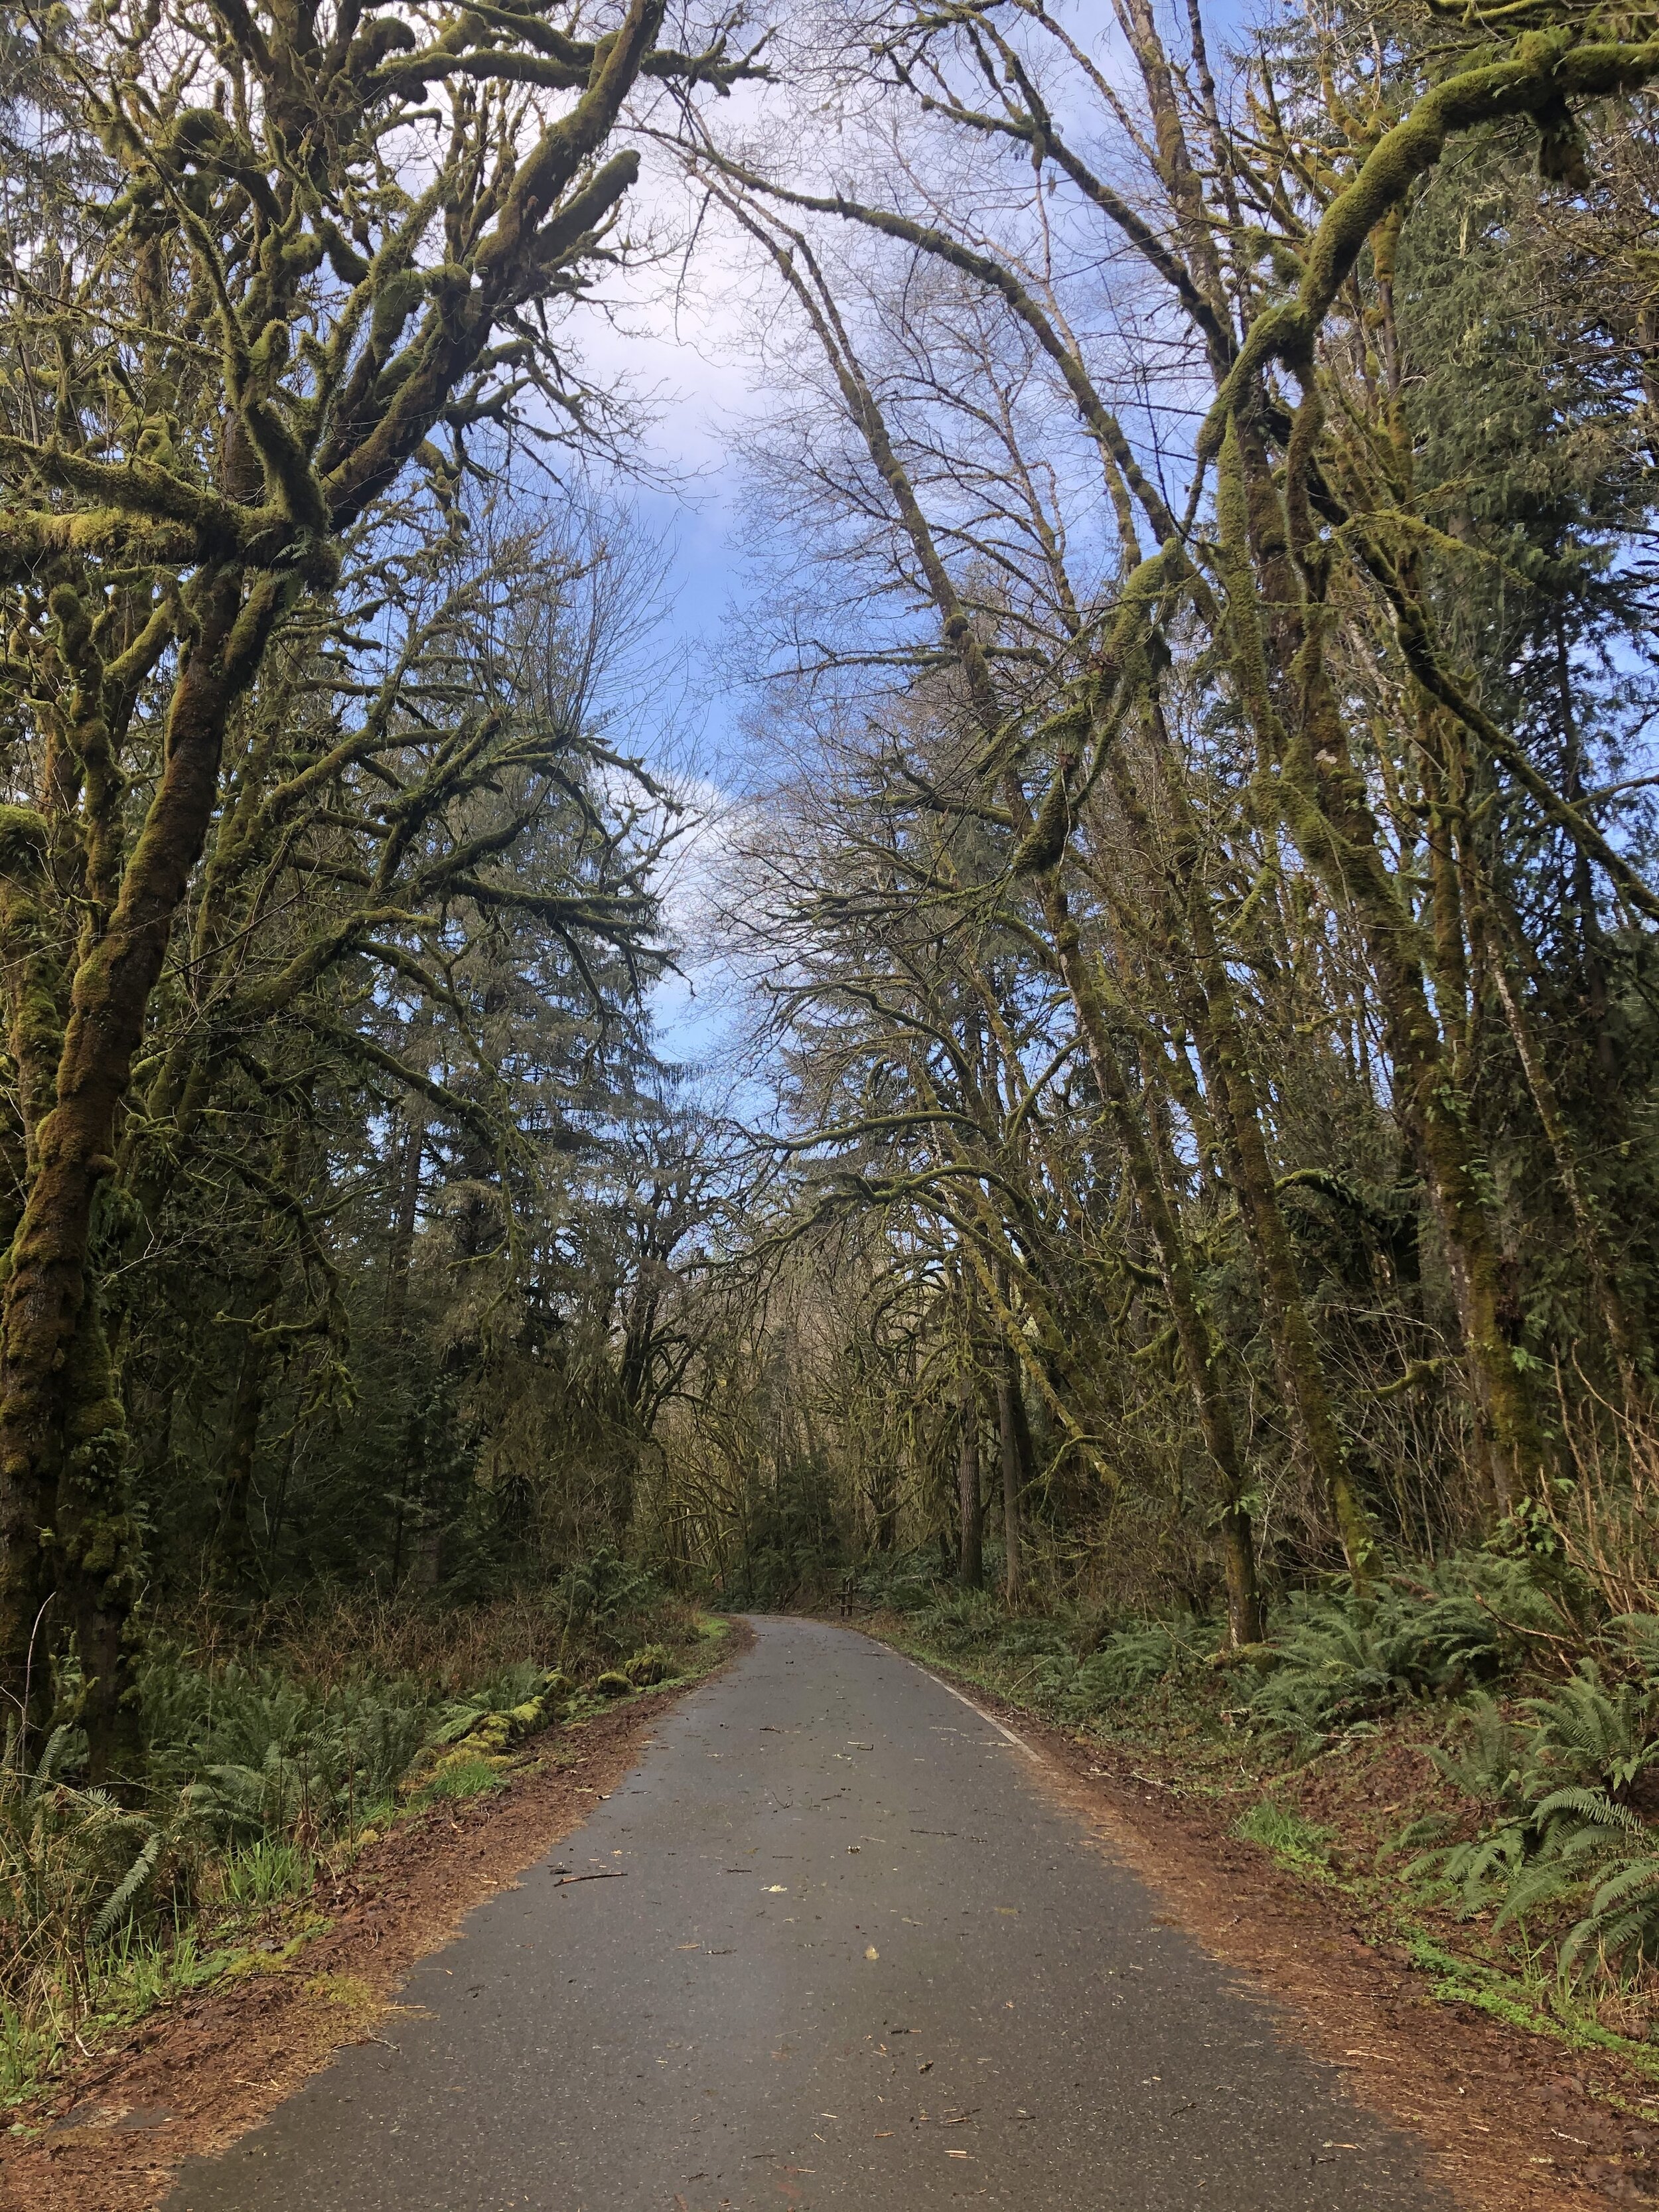
Porter Falls - Capitol State Forest


IMG_6866.jpeg

This year, I plan to get in as much hiking as possible. The original goal was one hike a week, which means 52 hikes total. This quickly changed to at least 26 or about one every other week because I knew that there would be weeks where I wouldn’t be able to hike. There will also be weeks where I’ll be able to hike multiple times.

For my first hike of the year, I went to Capitol State Forest and hiked to Porter Falls.

I started the hike at about 11 AM. There were 4 other cars at the trailhead but I didn't see anyone around. A few other cars were parked sporadically on the road but I have no idea what they were doing because they parked quite far from the trailhead. Even though there were a few cars at the trailhead, I only saw two people on the trail. 

The park is pretty accessible but can be problematic for some. The main difficulty of the drive resulted from the condition of the park’s roads. Once you hit the park's land, it's almost all gravel roads until you hit the trailhead. Mixed in with the gravel were rocks but they were small and manageable. The main annoyance came from all the potholes. It didn’t help that it's been raining because the potholes were essentially all filled with water so it was hard to gauge their depth. On this day, there were a few fallen branches on the road but nothing big. They were easily driven over. I drove a Toyota Corolla on this trip and was able to pretty much dodge or drive over all obstacles. That being said and if I could go back, I would've taken my truck. Having something with decent ground clearance would've made going through the park’s roads much easier and faster.

IMG_6872.jpeg

As far as the hike, it's very manageable. About one mile each way with little elevation gain. Going to the falls, it seemed like all the elevation gain was at the beginning. Coming back, all the elevation gain was near the falls. 

The trail was in overall good condition. It was mostly clear and easily navigable. There was only one stretch of land that was covered in mud. Some of it was enough to suck your shoes in. There wasn’t much dodging it unless you go out of your way off-trail. At this time of year, waterproof shoes are definitely recommended.

Porter Falls itself was ok. Prior to doing the hike, I did some minor research to see what the area looked like. Some people posted pictures showing the falls as large and grand. Others show something tiny. To me, it isn't one of those giant waterfalls but more of a small drop. It’s probably only 10-15 feet tall. Still, it was a pretty nice place to be. The fallen trees really added to the scenery for me. 

IMG_6903.jpeg

Overall, I think the hike makes a worthwhile day trip if you're looking for something short and don't require much effort.

There's one other thing that I wanted to note. Walking on the trail I kept hearing engines rev as if people were racing down the roads. Getting back to the parking lot, there was a group of people with their quads. They were speeding around the parked cars. The parking space is essentially dirt and gravel so you can imagine all that being picked up and thrown at the parked cars as they raced by. Extremely inconsiderate. I doubt this is the norm but it obviously does happen. 

For me, aside from the inconsiderate people at the parking lot, it was an overall enjoyable experience. I don't know if I would do the hike again, but I think it's worth a one time try. 

B9806DE5-D081-4AA0-93A7-464BD1E3D168-1.jpeg


Want to support my work?

Consider visiting the shop and buying "Absolutely Nothing"
https://www.HaiHoangTran.com/shop/absolutely-nothing

or

Become a Patron!
https://www.patreon.com/HaiHoangTran

or

PayPal
https://www.PayPal.me/HaiHoangTran

or

Just shop on Amazon via this link!
https://amzn.to/2FgsDnG

Minimizing my Camera gear for Travel

Nothing is finalized yet, but it’s looking like I’ll be spending a good portion on my summer traveling abroad. This may be my most complicated trip in terms of logistics and when traveling, the thing that complicates my trips the most has to be my camera gear. I’m the type of person that likes to pack everything to make sure that I forget nothing. This just means that I bring a lot of stuff. This makes traveling complicated because before I even get to my destination, I have to worry about whether or not the gear will even successfully make it on the plane and inside the cabin. If you’ve haven’t seen it, in my Traveling by Plane with Camera Gear video, I talked about how camera gear and anything that you find valuable should be taken into the cabin as a carryon because unless you’re traveling with something like a Pelican case, there is a huge chance of the gear getting damaged. From my experience, the best way to get this done is to just travel with a bag that will blatantly fall within carryon size requirements and to travel light because many international airlines have a strict carryon weight requirement. Downsizing my gear of course also has the benefit of making my entire experience more enjoyable because I don’t have as much to carry around. With all of that in mind, I’m going to walk you through what I think will be the best minimal setup for me.

First let’s talk about the bag because that’s possibly the most important factor to all of this. The bag that I’ve decided on is the Jill-E Designs JACK Hemingway 15" Leather Backpack. This is a new bag for me but I saw the potential because it seems to be pretty well setup for travel even though it’s fairly simple and minimal. On the outside is one external pocket. This is pretty decently sized and I think it’ll be good for holding things like filters, batteries and small accessories like that. On the side of the bag is a zipper which leads to a stretch panel made for a water bottle but I’ll probably make this work with my travel tripod. Moving inside, the bag has a bunch of organization pockets for pens, electronic devices and the like. I chose this backpack because like I said earlier, it is blatantly smaller than any carryon size requirement. I’m certain that this bag will actually work as a personal item, which is another type of baggage that you’re typically allowed in the cabin. Again, watch that Traveling by Plane with Camera Gear video to learn more about this. So, if I’m able to efficiently use this bag, I’ll actually still be allotted a carryon luggage. This means that I’ll just be able to carry on my essentials in the carryon and maybe not need anything else besides the two bags.

My current plan is to use the Jill-E bag as my camera bag and I’ll be able to accomplish this with the various camera inserts that are available for this bag. I actually own two different inserts, the
Jill-E Designs Jack Backpack Insert and the Jill-E Designs E-Go Camera Insert. Right now, it’s looking like I’ll be bringing both of these along for my trip. The larger Backpack Insert will be used when I’m just traveling and have everything put away. The E-Go Camera Insert will be for short day trip use where I’m just carrying one body and one lens. The E-Go Camera Insert actually comes with its own carrying strap that turns the insert into an independent bag so if I really want to go minimal, this is an option. Again, if I’m able to carry all my camera gear in this bag, it’s going to make my life a lot easier when traveling and frees up my carryon.

Now, let’s talk about the camera gear that I’ll be bringing. After some thought, I think that I’ll only be bringing one main camera setup and that’ll be the Sony A7RIII and the Sony 24-70mm f/2.8 GM. This is the setup that I most use on a day to day basis and the setup that I’m most used to. With this, I’m pretty much able to get anything done. I’ve actually traveled with a similar setup in the past and it was nice but definitely limiting. I shoot photos and videos and having only one camera really makes this difficult because I can only shoot photos or videos, not both at the same time. Sometimes, I like to get footage of myself doing photography. This is obviously not possible with only one camera. The only answer is to bring another camera, one for photos and one for videos. So, if I do bring another camera it will be the Sony A7RII and attached to that will be the Sony Vario-Tessar T* FE 16-35mm f/4 ZA OSS Lens. Finally, the tripod. A lot of my work involves the use of a tripod so it’s just something that I’ll have to bring. The one that I’ve decided to bring is the Benro FIF19CIB0. This is my current favorite travel tripod. It’s small, lightweight and extremely capable.

Like I said, the trip is not finalized yet. I don’t know when I’ll be leaving, where I’m going or which airline I’ll be flying with. That last factor is a major determiner for all of this. Different airlines have different regulations for luggages. The airline that I fly with will play a role in the gear that I bring.

All that being said, this is looking to be a travel heavy summer. There’s going to be a lot of new travel/photography content coming soon so make sure to check back for that!


If you're considering on buying any of the products mentioned, please support my work by using the links below.

Jill-E Designs JACK Hemingway 15" Leather Backpack https://amzn.to/2KlAoNQ

Jill-E Designs Jack Backpack Insert https://amzn.to/31DV3lk

Jill-E Designs E-Go Camera Insert https://amzn.to/2RiCte0

Sony A7RIII https://amzn.to/31ABpXE

Sony 24-70mm f/2.8 GM https://amzn.to/2IjKXPa

Sony A7RII https://amzn.to/2O35rwl

Sony Vario-Tessar T* FE 16-35mm f/4 ZA OSS Lens https://amzn.to/2JED5VG

Benro FIF19CIB0 https://amzn.to/2Idiw6x


Want to support my work?

Consider visiting the shop and buying "Absolutely Nothing"

https://www.TheUpperLeftUSA.com/shop/absolutely-nothing

or

Become a Patron!

https://www.patreon.com/HaiHoangTran

How I planned to photograph the Wreck of the Peter Iredale

As you can see by the linked video above, I recently went and tried to photograph the Peter Iredale shipwreck in Warrenton, Oregon. This was a planned spontaneous trip. That’s completely contradictory but let me explain. I had a 3 day window to make this trip happened so in that sense, the trip was planned. Other than that, I had no idea when I was actually going to go because there were specific conditions that I was looking forward to photographing. In this blog, I’ll lay out the things that I considered and maybe that’ll help you out on your own adventure.

IMG_A853864C8EA4-1.jpeg


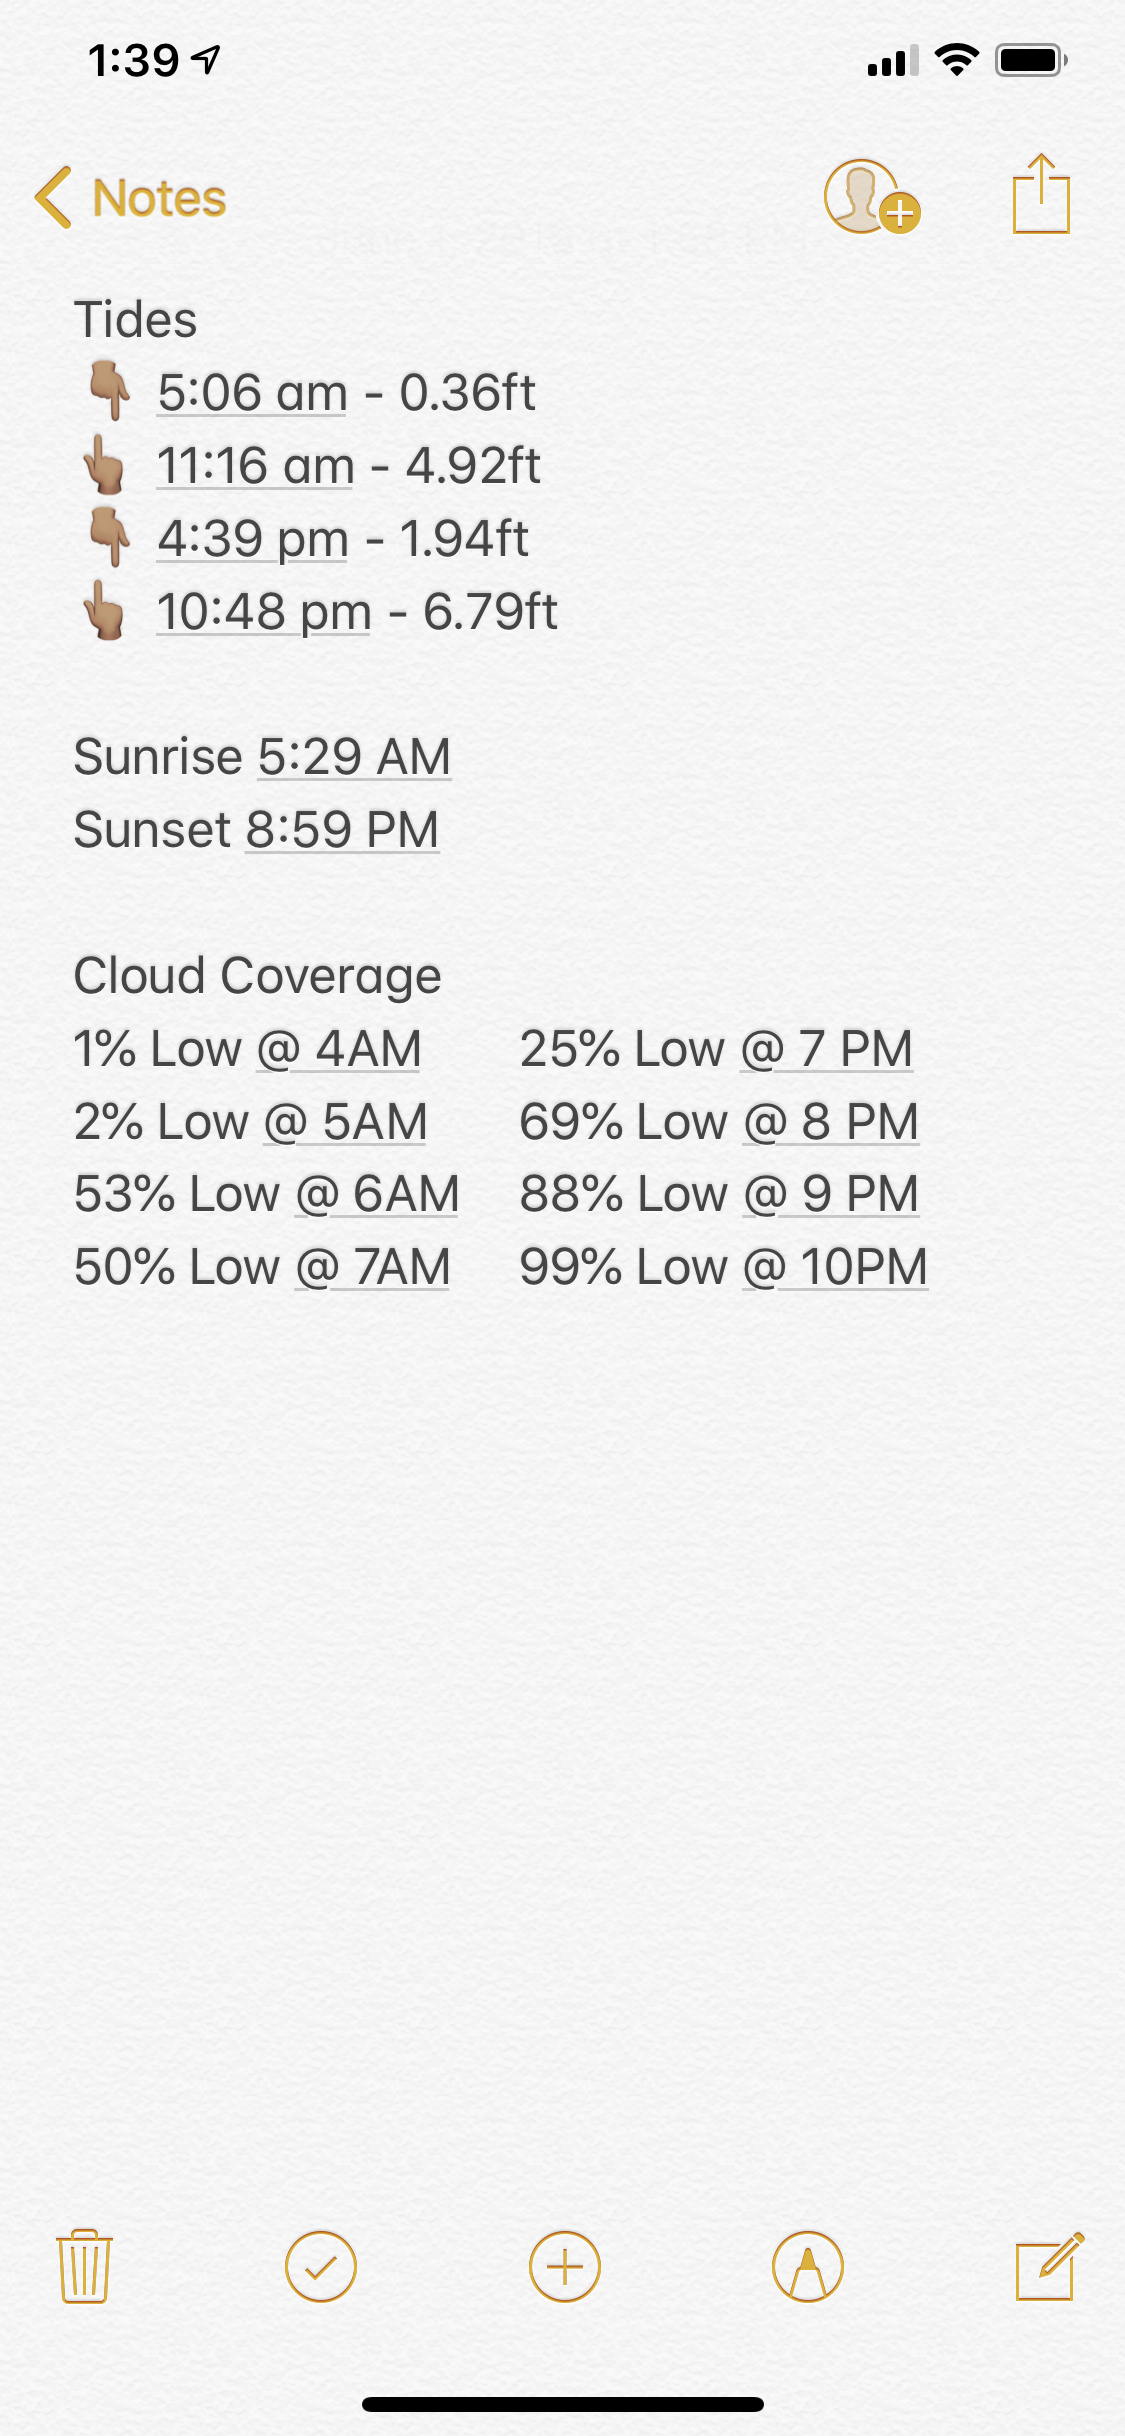
When it comes to timing my photography, the attached screenshot pretty much says it all. Tide schedule, sunrise/sunset times and cloud coverage. These are the 3 most important environmental factors that I consider when doing landscape photography. Realistically, the tides only come into play in some scenarios because they only have a big effect when photographing near large bodies of water. The other 2, are hypercritical. Nevertheless, I’ll cover all 3 factors and how they effect my photography.

First, the tides. Again, this is only something to consider when photographing near large bodies of water. Since the Peter Iredale sits on a beach right next to the Pacific Ocean, the tides can have some drastic effects on the composition. For this location, I knew that I wanted a composition with high tide. I’ve seen photos of the Peter Iredale in low tide and it’s not exactly the prettiest site. The Peter Iredale has been shipwrecked for over 100 years. Spending all that time in salt water did not treat the ship well. It is completely rusted over and there is very little left of it. In low tide, I think it just looks like large scrape metal siting in the sand. However, the rising tide really provides a whole new prospective to the subject. The tides provide a surface for reflections and adds some movement to the scene. It just makes the entire location so much more interesting. Because of this, I had to make sure that I was photographing near one of the high tide times, 11:16AM or 10:48PM.

Next, I had to align the high tide times with sunrise or sunset. This should be obvious. Most photographers would say that the best light is going to be around sunrise and sunset. These times provide that soft light that just seems to make any subject look better and, of course, once in awhile we get some fantastical colors that can really only be seen around these times. I typically am a sunrise shooter and never go at sunset unless I’m already at the location. If it’s a planned trip, I almost always go at sunrise. This is simply because there are going to be much less people around. At sunset, most people are going to be awake and exploring. This just means that tourist attractions like the Peter Iredale are going to be flooded with people. People who will walk into the composition and interrupt my work. I’d rather just avoid this and go at sunrise when very few people are going to be interested enough in anything to actually make the effort of waking up that early. However, to me, the Peter Iredale is a sunset location. If you track the sun movement pattern at this location, you will see that the sun rises over land and sets over the ocean. Considering that I’m looking for high tide, it’s going to be much easier to stand on land, shooting sunset over the ocean than standing in the ocean and shooting sunrise over land. It’s also important to note that most of the crazy colors that we see during sunrise/sunset is going to be near the sun. So in this case, it just makes sense to go at sunset because the sun and possible crazy sunset colors will be over the ocean, which happens to be the direction that I was photographing to capture the high tide. See? It all comes together.

Lastly, cloud coverage. Clouds contribute to the overall lighting but most importantly on this shoot, sunset conditions. Getting those fantastic sunrise/sunsets are tricky. The conditions have to be just right or you’ll just get the very typical yellow sunrise/sunset. A big determiner is the cloud coverage. There’s a lot that goes into this so I’ll try to make it as simple and straight forward as possible. There are various types of clouds and they sit in different sections of the sky. Some clouds offer a better chance of a great sunrise/sunset than others. For the sake of simplicity, let’s just consider that there are low, medium and high clouds. Low clouds are generally bad for sunrise/sunsets. Low clouds are low in the sky and sit near the horizon. This is also where the sun rises and sets. So if there is a lot of low clouds, the sun will be blocked and there will be no fantastic sunrise/sunset. Ideally, we want medium and high clouds but there is a thing as having too little or too much of any. On the day that I photographed the Peter Iredale, there were no medium or high clouds, just a lot of low clouds. Believe it or not, this was actually the most favorable forecast for the days that I could go. On other days, there was predicted 100% low cloud coverage so I knew that there was no chance of a sunset. Still, predicted 88% low cloud coverage isn’t ideal and that really effected my images negatively.

And that’s just about everything that I considered in terms of atmospheric conditions for this shoot. The things that I’ve laid out can effect most outdoor photography situations so it’s helpful to understand them. Next time you go out, take some time to look at the various condition forecasts. Take note of what they are and how they effected your photography. After some time, you’ll be able to understand what everything means and what to look for. All of that being said, it’s more important to just get out and shoot. Get the practice in. Don’t get caught up in planning for the best conditions and prevent yourself from going out on a possibly bad condition day. Remember that the forecasts are largely predictions and estimates. Conditions constantly change. You never know when that crazy sunrise/sunset is going to happen. So get out as much as possible.


Want to support my work?

Consider visiting the shop and buying "Absolutely Nothing"

https://www.TheUpperLeftUSA.com/shop/absolutely-nothing

or

Become a Patron!

https://www.patreon.com/HaiHoangTran

COPYRIGHT INFRINGEMENT

This has been a very interesting week for me in terms of copyright infringement. Earlier this week, I decided to hop on OfferUp to see if there were any good deals on some camera gear. I wasn’t necessarily looking for a cage for the Sony a6300, but this one caught my attention because of the thumbnail photo. I had no doubts about it, this is the same photo that I used for a YouTube video where I reviewed the same product.

In this situation, I just found it more funny than anything that someone was too lazy to take a quick photo (even with a cellphone) and would rather steal someone else’s photo. This should be common knowledge, but don’t steal other people’s work especially when it is used in advertising and for monetary gains. That’s a good way to get a lawsuit launched at you. Obviously, there’s no gain on my part from doing this because this person is only selling the cage for $30 but the advice still stands. DON’T STEAL OTHER’S WORK!!!

They say lightning never strikes the same place twice, but I’d say that this next case strikes pretty close. Moments ago, I went to check the business email that I have attached to this website and noticed that I got an email with no subject and just a YouTube link. This email was in my spam folder so my first thought was that this was just some spammer trying to send me to a scam. Against my better judgements, I clicked the link anyways and am glad that I did because it sent me to a direct re-upload of a previous review that I made for the Fujifilm Instax Mini 90.

This situation is a little more upsetting because the uploader wasn’t just stealing one still image like the previous person, this uploader reused my entire video with watermark/logo and all. They even added their own links leading people to their online store to buy the camera. Going to the user’s YouTube account, it is clear that this person just steals other creator’s work and re-upload them in an attempt to drive traffic to their store.

As a content creator, the work that I put out represents me and my efforts. This type of theft is not something that I’m willing to accept. Of course, we live in the digital age and this type of stuff is all handled online. At this point, I’ve filed a copyright claim against this account and am waiting for a reply from Google. Hopefully, they see the obvious copyright infringement and not only take my stolen video down but reexamines the entire spam YouTube account.

I’ll add an update to this post when I get an update on the situation.


*UPDATE*

After filing the first YouTube copyright claim, it came to my attention that there were two other accounts that had done the same thing, downloaded my video and re-uploaded it to advertise for the user’s online store. I also filed copyright claims against these accounts and am happy to say that all three videos were taken down.


*UPDATE 2*

I recently received an email from YouTube saying how they’ve implemented a new copyright system where they are able to match my content up with possible re-uploads. After checking out the new system, it was apparent that my original Instax video was a lot more popular with these re-uploaders than I thought. A few of my most popular videos were actually stolen. Luckily with this new system, I’m able to file a copyright claim much quicker and was able to take all of the re-uploads down.


Want to support my work?
Consider visiting the shop and buying "Absolutely Nothing"
https://www.TheUpperLeftUSA.com/shop/absolutely-nothing

or

Become a Patron!
https://www.patreon.com/HaiHoangTran