Review

Best Acessory for Filter Users | Manfrotto Xume Quick Release Adapters


Lens filters are pretty straight forward. The majority of them get screwed onto the front filter thread of a lens. This approach to mounting a filter works, but is not the most efficient. To me, this is one of those things that has been so widely implemented that no manufacturer dares to diverge from the norm, even if there is a better solution. That better solution may just be the Manfrotto Xume Quick Release Adapters.

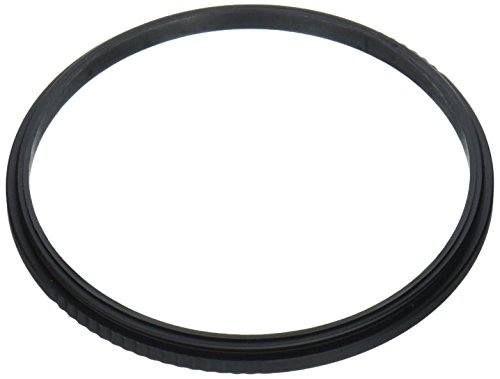
The Xume adapters consist of two different pieces, the lens adapter (attaches to your lens’ front filter thread) and the filter holder (attaches to the back of the filter). These two parts create a magnetic connection between each other and when installed to your lens and filter, it allows you to magnetically install your filters with little effort. The magnetic connection has just the right amount of strength to hold a filter in place without it falling off and still allows you to easily take the filter off when need be.

But just how strong is the connection? What if you don’t use just one filter, but an entire filter system? In the video above, I showed the use of the Xume adapters with my Wine Country Camera filter holder. This is a high quality filter holder and with that quality comes weight as the holder is made entirely from metal and wood. The Xume adapters can efficiently hold my filter system, a circular polarizer and 3 additional solid ND filters. I can still also rotate the adapters and my filter holder around for times when I’m using an ND grad and of course take it on and off with ease. Needless to say, these adapters can hold anything that I would possibly need.

Although the Xume adapters are great, I do have one complaint. The Xume system simply does not allow you to use conventional lens caps. The Xume lens adapter is very thin and there is just not enough space for a lens cap to catch on and stay in place. There are specific Xume lens caps that you can buy that works with the lens adapter but from my research, it seems like these caps are only available in certain sizes. For example, my most used lens has a 82mm front filter thread so I bought the 82mm Xume adapter rings. When I tried to find and buy the 82mm Xume lens cap, it was like it’s nonexistent. I couldn’t find it anywhere, even from the manufacturer. 

To solve this problem, what I’ve done is bought a screw on lens caps (which would typically screw on to the front filter thread of a lens) and combined this with another Xume filter holder ring. This essentially turns the screw on lens can into a magnetic lens cap. Now, this work around functions just fine but it does cost some money. You have to buy the screw on lens cap and another lens adapter ring and that may cost more than the Xume branded lens cap if they were to make it.

But overall, the Xume is something that I do enjoy and would definitely recommend if you use filters a lot. It’ll save you a lot of time.


Manfrotto Xume https://amzn.to/2RCqgTT

Manfrotto Xume Lens Cap https://amzn.to/2C7M28f

Screw on Lens Cap https://amzn.to/2SLoDAS

Wine Country Camera Filter System https://amzn.to/2ReZe5M


Want to support my work?
Consider visiting the shop and buying "Absolutely Nothing"
https://www.TheUpperLeftUSA.com/shop/absolutely-nothing

or

Become a Patron!
https://www.patreon.com/HaiHoangTran

Peak Design Everyday Messenger V2 vs V1


If you're considering on buying any of these products, please support my work by using the links below.

Get 10% off your Peak Design order from the official website by using these links
http://bit.ly/2NFh006
or
https://www.peakdesign.com?rfsn=1824705.61bab1&utm_source=refersion&utm_medium=affiliate&utm_campaign=1824705.61bab1

Peak Design Everyday Messenger V2
https://www.peakdesign.com/products/everyday-messenger/?variant=11616318750764&rfsn=1824705.61bab1&utm_source=refersion&utm_medium=affiliate&utm_campaign=1824705.61bab1

Peak Design Everyday Messenger 15" V1 (Charcoal) https://amzn.to/2MDe7Yu
Peak Design Everyday Messenger Bag 15" V1 (Ash) https://amzn.to/2MD2mRV
Peak Design Everyday Messenger Bag 15" V1 (Heritage Tan) https://amzn.to/2xpIZpP

Peak Design Everyday Messenger Bag 13" V1 (Charcoal) https://amzn.to/2xfe3JI
Peak Design Everyday Messenger Bag 13" V1 (Ash) https://amzn.to/2xiBgdI
Peak Design Everyday Messenger Bag 13" V1 (Heritage Tan) https://amzn.to/2xpDYgW


Want to support my work?
Consider visiting the shop and buying "Absolutely Nothing"
https://www.TheUpperLeftUSA.com/shop/absolutely-nothing

or

Become a Patron!
https://www.patreon.com/HaiHoangTran

Autofocus Manual Lenses | Fotodiox Pro Pronto Leica M Mount to Sony E Mount Adapter


One of the great things about owning a mirrorless camera is it's flexibility when it comes to adapting lenses from other manufacturers. I personally use the Sony Alpha mirrorless system and since its inception, various companies have developed different lens mount adapters to allow the use of lenses from other manufacturers. This is great but only the major brands get the attention for autofocus adapter development. The older and less remembered lens mounts typically only get a very simple dummy adapter that does not transmit any information from the lens to the camera body. This all changes with the Fotodiox Pro Pronto adapter. 

The Pronto is essentially a lens mount adapter for converting Leica M mount lenses to Sony E mount. The main difference between this and any other adapter is that this one has a built-in motor that allows for autofocus and has support for AFS, AFC and face detection. Eye AF and lock on AF do not work. You can also change the focus area from wide to center or flexible spot but remember that by reducing the focus area, you can get a reduction in overall focus speed. 

This adapter autofocuses by physically moving the lens in and out within a 4.5mm range and according to Fotodiox, this should be enough for most lenses. A benefit of this method would be that you are also able to improve the minimum focusing distance of a lens by essentially using the adapter as an extension tube. This is great because rangefinder lenses are typically not very good at close focusing. With M mount lenses, the minimum focusing distance is typically around .7 of a meter or 2.3’.

This adapter can support a lens setup up to 2 lbs or 907 grams. That is huge considering that the Sony A7RII that I mount this adapter to only weighs 625 grams. My Sony 16-35mm f/4 weighs 518 grams. My Sony 24-70mm f/2.8 GM? 886 grams. Still under the max load capacity of this adapter. When you start looking at the weight of various lenses, you start to realize just how much this adapter can muster and I have to say, I’m quite impressed. 

Now you may be saying to yourself, this is all well but I don’t own Leica M mount lenses so I have no use for this adapter. Well, maybe not. Remember, the lenses from other manufacturers can easily be adapted to the Leica M mount. For example, here is a Nikon lens adapted to the Leica M mount with the use of another adapter. This, in turn, means that I can use this and other Nikon F lenses with the Pronto adapter to not only mount to my Sony E mount camera but also achieve autofocus with these older manual focus lenses. Of course, this is not just exclusive to Nikon F mount lenses, but really any lens that can be adapted to Leica M and this is why this adapter is so amazing. It opens up a whole new world for those who have manual focus lenses but want autofocus capabilities. 

It should be noted that this adapter is designed to be used with E mount cameras that feature phase detection and was not intended to support cameras with only contrast detection autofocus. If you’re interested in using this device, make sure that your camera body is compatible. Current Sony cameras with Phase Detection AF include the Sony a6300/a6500, a7II/a7III, A7RII/a7RIII and a9. 

Another thing to note would be noise that this adapter makes. The focusing motor of the adapter is audible, but it’s hard to complain about this because it is what it is. If some minor focusing noise means that I can autofocus my manual lenses, then I’ll take it. Also, if you’re interested in using this adapter in any scenario where there’s background noise like in the city, it’s likely that the noise of the city will drown out the noise of the adapter. In quiet locations like a studio, a library, or a church, sure people a few feet away may notice the noise but any significant distance and they won't hear a thing. I personally don’t think the noise is that big a deal.

Since we are talking about an adapter that allows for autofocus, I’m sure you’re wondering just how well this adapter performs. This is tough to express because autofocus performance can be somewhat subjective. It’s really based on the gear that you use and what you’re used to. For example, I often use the Nikon N2020 which was one of the early pioneers of autofocus. In comparison to today’s cameras, the autofocus on the N2020 is atrocious but it was just about the best of its time. I still often use this camera and am able to capture images with its slow autofocus system and in comparison, the Pronto on the A7RII destroys the autofocus on the N2020 so that’s great. 

Since I'm mounting the Pronto on a Sony camera, how do I think it performs in comparison to Sony native lenses? This is tough to say because it depends. In good lighting, this adapter can perform flawlessness and autofocus is very fast. Just about as fast as a native lens. On the other hand, in certain dark scenes, the autofocus can be nearly unusable where a native lens will likely still be able to perform. So autofocus performance can fluctuate and is greatly dependent on lighting conditions. 

My main intention for this adapter is to use it in street photography scenarios and after being able to try it out on the street, I would say that I’m happy with the adapter’s performance. It was able to handle the constant changing environment throughout the day and that's what I need. At the end of the day, this adapter is meant to allow me to autofocus with my manual lenses and I think it does an excellent job at it. For my purposes, this adapter is a winner and comes highly recommended. 


If you're considering on buying any of these products, please support my work by using the links below.

Fotodiox Pro Pronto Leica M Mount to Sony E Mount Adapter https://amzn.to/2NCFLFZ
Nikon F to Leica M Adapter https://amzn.to/2uUKZF3
Sony A7RII https://amzn.to/2LDe2V3
Sony FE 24-70mm f/2.8 GM Lens https://amzn.to/2uzrsuq
Sony Vario-Tessar T* FE 16-35mm f/4 ZA OSS Lens https://amzn.to/2JED5VG


Want to support my work?
Consider visiting the shop and buying "Absolutely Nothing"
https://www.TheUpperLeftUSA.com/shop/absolutely-nothing

or

Become a Patron!
https://www.patreon.com/HaiHoangTran

My Camera Gear

This list of gear is what I currently own and use. The list will be updated as my gear change. If you're interested in buying any of the listed product, click the name of the product to be taken to it's product page. I'd appreciate it if you use the links provided as they are affiliate links and will give me a small commission at no extra cost to you.


Digital Camera Bodies & Lenses

Sony A7RIII - This is my go to digital body for photography. 42mp sensor and 4K video capabilities means that it's an excellent option for hybrid shooters.

Sony FE 24-70mm f/2.8 GM Lens - The 24-70 f/2.8 is the most useful/versatile lens, in my opinion. This is the lens that I make sure to get no matter the camera system that I'm using. 

Sony A7RIISony Vario-Tessar T* FE 16-35mm f/4 ZA OSS Lens
If you’ve kept up with my work for a long time, you’d know that I actually sold this setup but had the ability to borrow it whenever I want. Well, I figured that I was borrowing it so much that I’d just buy it back, so I did. The A7RII is a great cheaper alternative to the A7RIII if you don't need the little refinements that the newer body provides. The 16-35mm f/4 is a sharp and relatively cheap wide angle lens that is extremely flexible. I enjoy this setup very much and am currently using it to record all of my YouTube videos.

Samyang 35mm f/2.8 AF - This is the lens that I use when I want a small, lightweight and compact lens. This lens is TINY and produces great results. Full review here.


Filters

Wine Country Camera Filter Holder - Like I said in (THIS VIDEO), this is the best camera filter system on the market.

Wine Country Camera Blackstone ND Filters - I currently own the 3, 6, and 9 stop ND filters. These are the best ND filters that I've tried yet.


Tripods

Manfrotto MT190CXPRO4 Tripod - This is actually the first pair of tripod legs that I ever bought. It's like my dad taught me, buy something that may cost a bit more the first time around, and it'll last a long time so you don't have to waste any more money buying another one. Of all the tripod legs that I’ve had throughout the years, this is by far my favorite.

Manfrotto MH057M0-Q5 Ballhead - Along with my first tripod, this is my first ballhead. I like this particular one because it uses the Manfrotto 501PL plate, which is generally what many video heads use. This means that I only need one plate for both photo and video setups. 

Sirui A1205 - My new travel tripod. Small, lightweight and capable! I’m using this tripod more and more and it has been the first option on many occasions.

Benro FIF19CIB0 - Another travel tripod that I own. This has actually become my main tripod. Whenever I only need one tripod, this is the one that I grab. Although the technical specifications of the Sirui is better on paper, I actually think this tripod performs better.

Manfrotto 502HD Fluid Head - The best fluid head in terms of bang for the buck in my opinion. Any time that you see me make a video in the studio, my camera is sitting on this head. Video review HERE


Additional Equipment to make YouTube Videos

Sony FDR-X3000 - My most used action camera. It has great video quality and the built-in optical lens stabilization works great to provide smoother shots. 

Shure VP83 LensHopper Camera-Mounted Condenser Microphone - Shotgun mic that I use in the studio.

Movo VXR10 - A more affordable shotgun mic that I currently use while vlogging.

Rode RodeLink Wireless Filmmaker System - Wireless mic system

Tascam DR-10L Digital Recorder & Lavalier Mic - Backup wireless mic system that costs significantly less than the one above. However, with this one, you will have to sync audio in post.

iPhone Xs Max  - I often use this phone to capture video and often get compliments on video quality.


Film Cameras & Lenses

Nikon F3 - My first film camera and one that I always recommend. This is a great film camera for users of all skill level. This thing is built like a tank and can last a lifetime.

Nikon F100 - The most technologically advanced film camera that I own. If you want to have a shooting experience like a modern camera, try this one. This is my go to film camera when I have a serious shoot and want to get consistent results because the camera has the adequate technology to provide it.

Nikon N90S - An in between of the Nikon F100 and the Nikon N2020. It’s a bit bigger and heavier but gets the job done.

Nikon N2020 - My favorite everyday film camera. It’s not the most technologically advanced camera but it’s just one of those things that feels right.

Nikonos V - My go to underwater/waterproof film camera. This is a cult classic and the recognition is well deserved.

Nikonos II - My backup underwater/waterproof film camera. A great camera but lack the light meter.

Nikon 50mm f/1.4 AI-S - A great fast 50mm lens that I often use on manual Nikon film cameras. This is a great lens for film cameras but also still very functional when adapted to modern cameras. I often use this lens on my Sony cameras and get fantastic result.

Nikon 50mm f/1.8 Series E - Probably the best bang for the buck lens that I’ve every bought. This lens can be purchased for very cheap and it still produces great results. This is my go to walk around manual lens because it is just about as small and compact as you can get for the F mount.

Nikon 50mm f/1.8D - My main autofocus lens for my more modern Nikon film cameras. This lens is still being produced today and is one of the cheapest full frame Nikon lenses that you can get. I like this lens so much that I bought it twice.

Nikon 24mm f/2.8D - If you’re looking for a compact wide angle prime, then I’d highly suggest checking this out. This is one of my most used focal lengths for landscape photography and as a portrait lens, it provides and interesting perspective that you’re not going to see a lot of.


Camera Bags

EVOC CP 26L - My new everyday camera backpack. I can’t say enough good things about this bag. Stylistically, this is such a good looking bag and holds enough for my everyday needs.

EVOC CP 35L - When the EVOC CP 26L isn’t big enough. They are essentially the same bag, this one is just bigger.

Mindshift Backlight 36L - The bag that I use when hiking/outdoors. The well padded straps make this a comfortable bag to carry on long hikes. I own both the Backlight 26L and 36L but opt for the 36L most of the time because I need to carry more equipment when making my landscape photography videos.

Lowepro ProTactic 450AW - My old go to. I used this bag 99% of the time. Whether it's walking through the city or traveling the world. Although this is now a backup bag, it is one that I still keep around because it’s a good all rounder.

Peak Design Sling 5L - This is the bag that I use when I don't feel like carrying a lot. This is for the minimalist setup, one body, one lens, and maybe a few smaller items. If you'd like to get 10% off your Peak Design order from the official website, use this link https://www.peakdesign.com?rfsn=1824705.61bab1

Peak Design Everyday Messenger V2 - The bag that I use for air travel. I like the V2 of this bag because it has a luggage passthrough that makes carrying a lot easier in conjunction with a luggage. If you'd like to get 10% off your Peak Design order from the official website, use this link https://www.peakdesign.com?rfsn=1824705.61bab1

Pelican 1510 - The standard in hard cases. This is is the case that I’ve used for the past few years and holds my camera gear everyday.

SKB iSeries 2011-7 - A new hard case that I’ve recently started using. It’s a great alternative to the Pelican 1510 and is a bit better if you’re looking for a case that you can pull around a lot.

No More Bloody Shins While Deadlifting | Slingshot Shin Savers by Mark Bell

Want to support my work?
Consider visiting the shop and buying "Absolutely Nothing"
https://www.TheUpperLeftUSA.com/shop/absolutely-nothing

or

Become a Patron!
https://www.patreon.com/HaiHoangTran


I have a little confession to make, I deadlift with bad form. This can be attributed to various things but what I’d like to point out is the fact that I rarely keep the bar close to my shins on the initial pull and drop. I used to be very good about this but if you do keep the bar close to your shins, you’d know that your shins get torn up quite a bit. 

I’ve tried to combat this by wearing higher socks and thicker sweats but it never worked out and what resulted is me leaving a gap between myself and the bar. 

Well, I recently discovered the Shin Savers by Mark Bell.

The Shin Savers are made from a neoprene-like material that’s under 5mms thick. They are 12.75 inches in length and are available from size Small to 4XL.


One thing to note on sizing, at the largest point around my calf, I measure about 15 inches around. This means that I’m sort of in between sizes small and medium. I went with a medium because to me, the Shin Savers were not designed to give you a super compressed fit or at least I didn’t buy them for any compression benefits. I’m using them to purely protect my shins. So in my mind, I just need something that holds in place. If you are between sizes, from my experience, sizing up was not a problem. I actually feel the compression around my calf so the medium really isn’t all that big on me.

These Shin Savers are specifically designed to save your shins from getting ripped up, but they do have the added benefit of keeping your calves warm and providing extra protection anywhere else needed. 

One thing that I would complain about with the Shin Savers is that it kind of sucks trying to get them on and off. Getting it on is okay but I always end up struggling getting them off. I have to straighten my foot as much as I can and then try to stretch the Shin Savers over everything. This isn’t the easiest thing because the material itself doesn’t stretch too much and this is really not something that I want to deal with after working out all night. The manufacturers can fix this by switching over to a design using either velcro or a zipper because after all, you only need these things to stay in place. You don’t have to worry about whether or not the velcro or zipper will burst open because your calf size doesn’t change too much when flexed. 

I’ve also only had these for a short amount of time so can’t attest to the durability but I personally don’t think they’ll last too long. Not because these are poorly made, but because they will be constantly rubbing against the knurling of a bar so just by nature, they will take some damage. But who knows, I could be wrong and they could last a long time. We’ll just have to see.

Overall, I’m enjoying this purchase and think that they will be really beneficial in the long run. They protect my shins and that’s all that I care about. 

If you're considering on buying any of these products, please support my work by using the links below.

Slingshot Shin Savers by Mark Bell
http://amzn.to/2EYxw2G
https://goo.gl/3v6ip7

Hẹn gặp lại.