Jollylook the WORST Instax Mini Camera

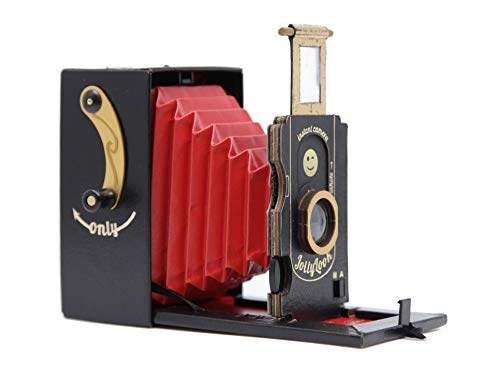
I was recently sent the Jollylook, the self-proclaimed first cardboard vintage instant film camera.

Needless to say, I was interested. I’ve been a fan of FujiFilm Instax and instant film in general for a while now. Those who have been with my YouTube channel for a long time will know that I’ve reviewed a few Instax cameras so I’m familiar with this genre of photography.

Using instant film is already vintage in a sense but what Jollylook has developed is next level vintage. They took the modern Instax mini film and made it work with a camera that looks like it’s a hundred years old. This is largely attributed to using a camera with bellows. Nevertheless, this is something very different from what every other Instax camera manufacturer is doing.

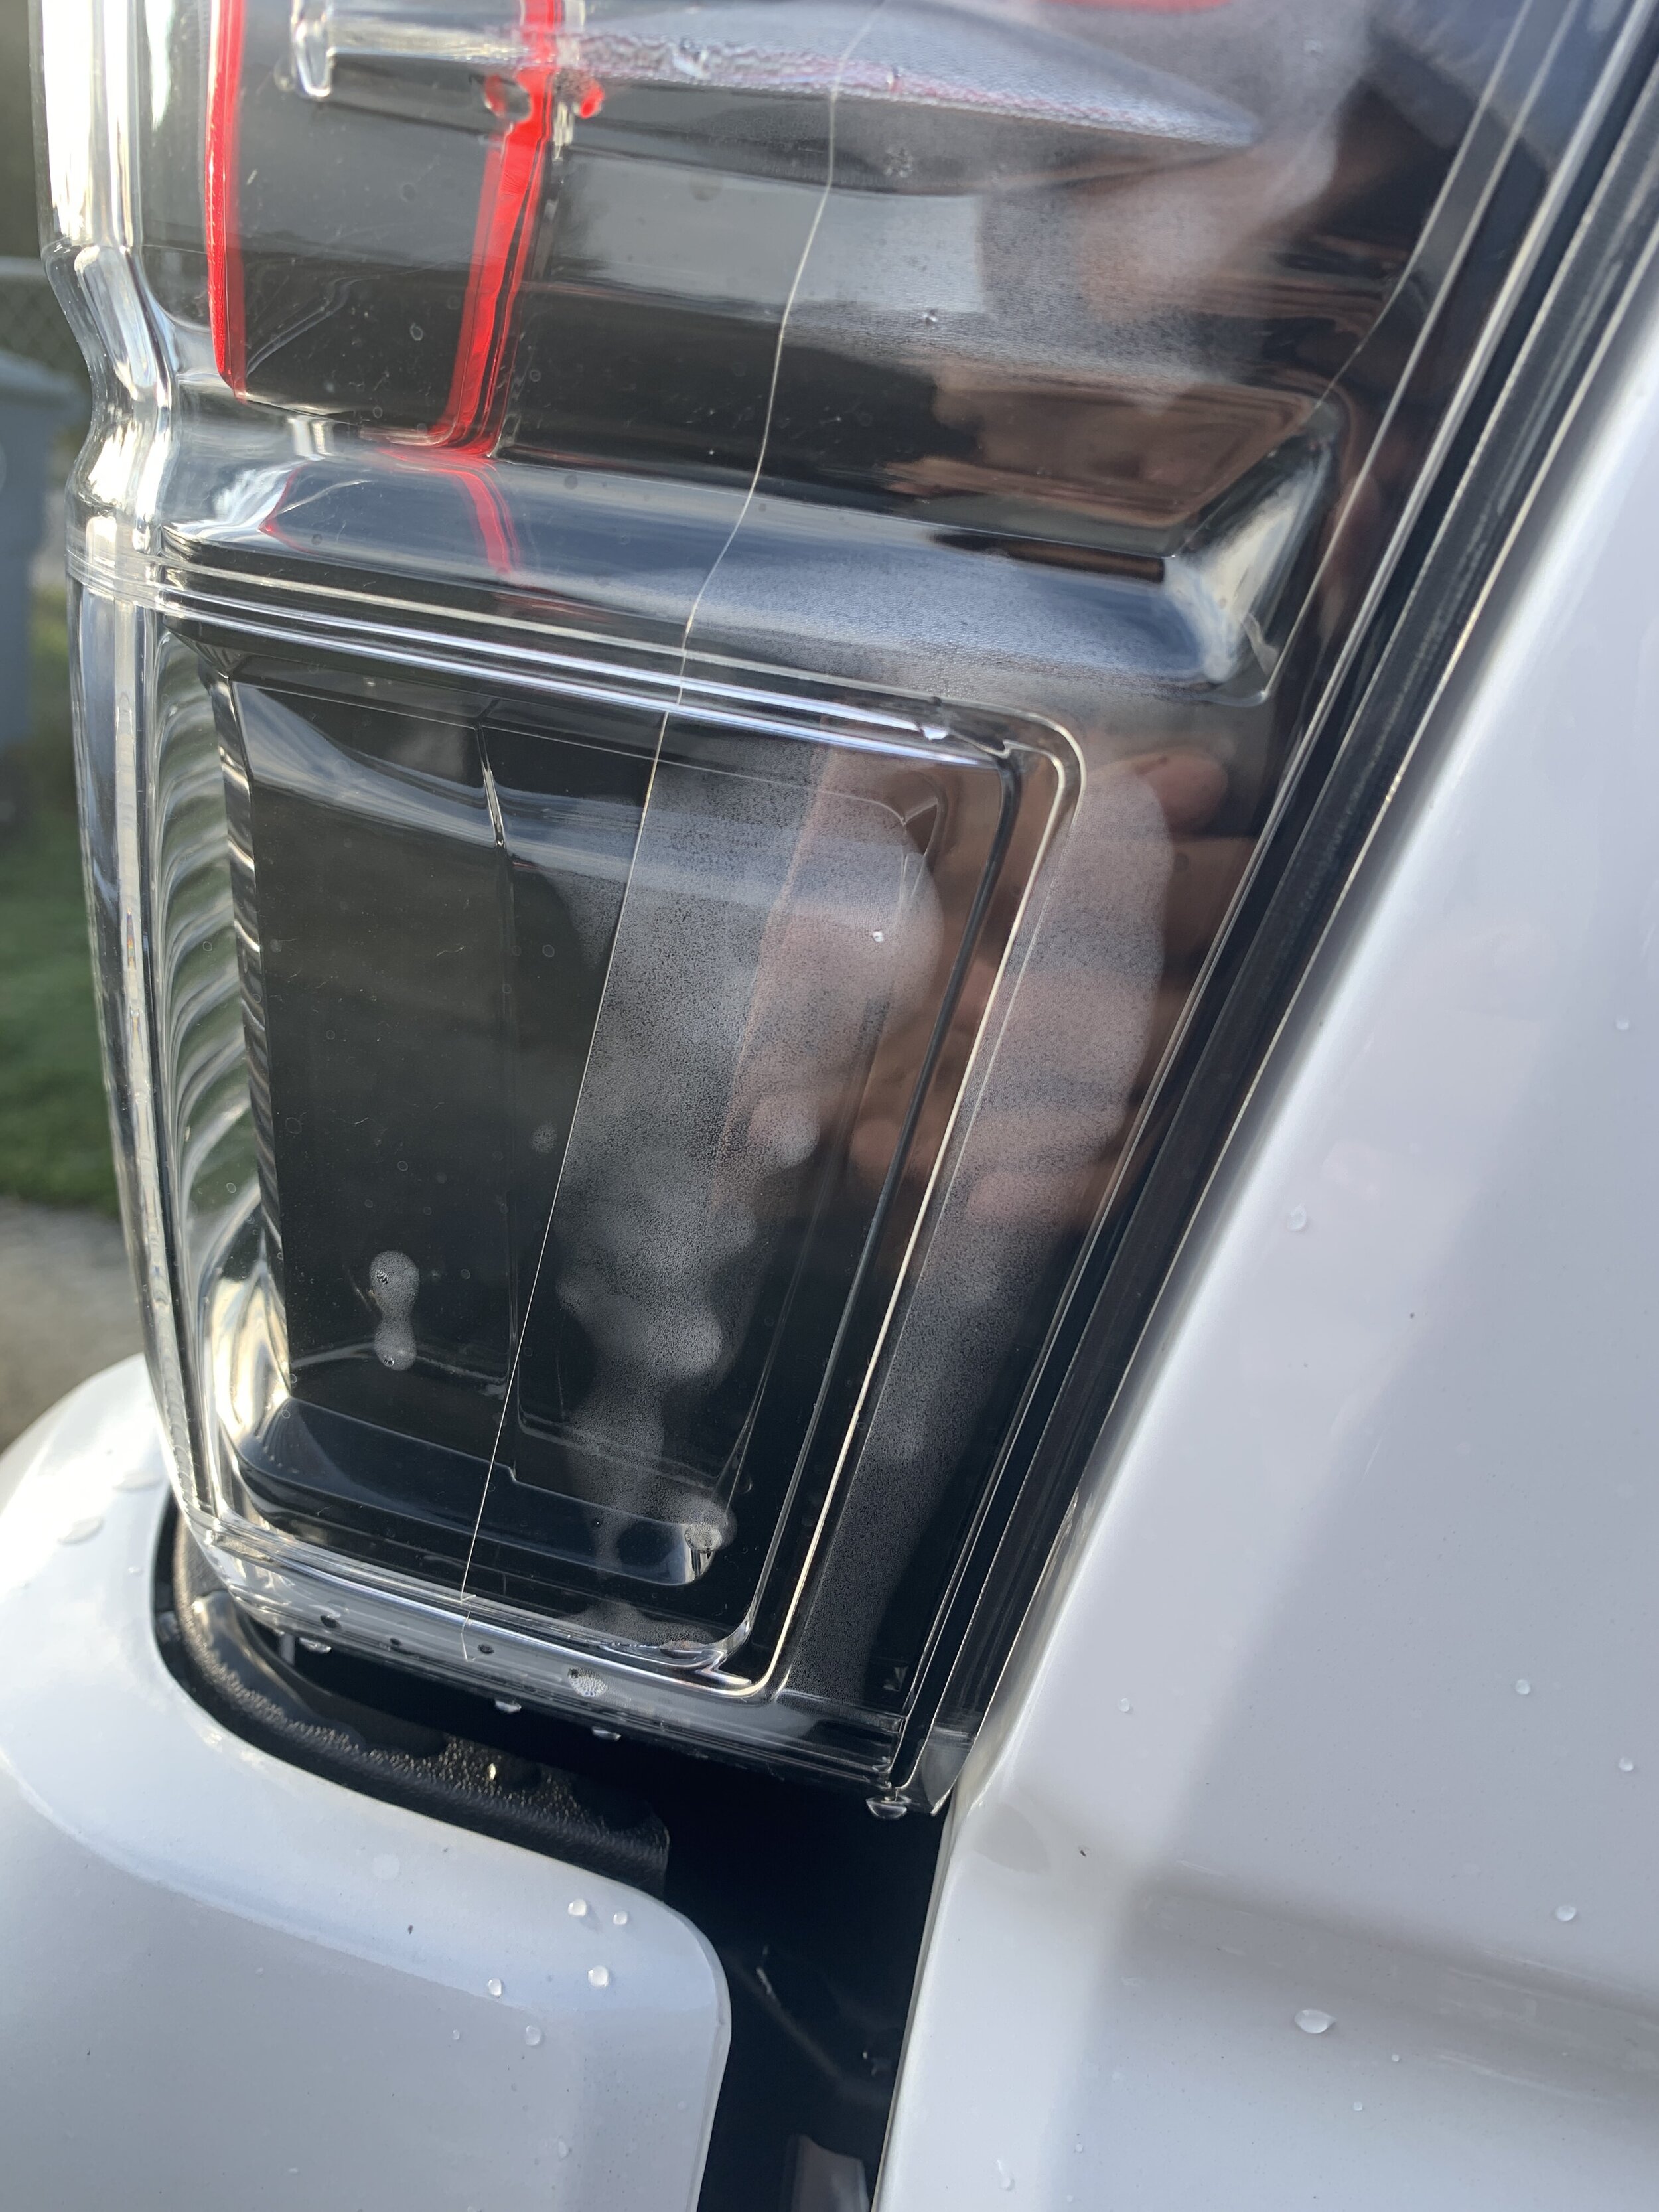
On the surface and while looking at the marketing, this seems to be a pretty cool camera. But let me tell you, problems arose immediately upon unboxing. Let’s first look at this camera in terms of construction. A major part of the Jollylook marketing is that it is made of cardboard. Now, I was never really excited about this because well, cardboard. This is a material that has a lot of drawbacks and weaknesses. Getting the Jollylook in hand, it’s apparent that it’s actually made from a variety of different materials including cardboard, vinyl, wood and metal. But it is largely cardboard wrapped in what I assume is a type of leatherette vinyl. My first issue with construction is that it seems like everything is glued together and some of the surfaces were already separating upon unboxing. The glue is just not holding up. I looked past this and actually tried to use the camera and this is where the issues really snowballed.

The process of actually using the camera is not a complicated one, but it is one that requires a few steps. The camera comes with instructions and the manufacturer has made an instructional video showing how to use the camera but you can’t understand the frustration until you try it yourself.

Scan 1.jpg

I’ve included a copy of the instructions for you to check out for yourself. I’ll just add some thoughts about them.

  • The bellows DO NOT work properly. Its length is just too short or the wrong material was used because when the lens panel is pulled out, the bellows just want to pull everything back into the camera body. If you look up #jollylook on Instagram, you actually see that some people put a stick in between the bellows just to make it properly extend. *UPDATE* It seems like this stick was previously included with the camera. I did not receive it along with other parts that I’ve seen. I can’t say that this was a mistake or the norm for current cameras that are sold.

  • The lens panel DOES NOT fit properly into the cutouts on the distance scale. The cutout is too small to fit the wood edges of the lens panel. Every time that I try to adjust the distance, I feel like I have to jam the edges of the lens panel into the distance scale. Over time, this section is likely going to be destroyed from use.

  • The diaphragm or aperture changing mechanism is just terrible. It’s very stiff and I feel that I have to put way too much force into adjusting it. This is likely going to take some damage after some use.

  • The viewfinder is extremely inaccurate. It gives you a rough idea of what you are shooting, but the final result will be greatly different from what you saw in the viewfinder.

  • The crank mechanism to advance the film is extremely inaccurate. It’s very difficult to know when to stop turning the handle. On multiple occasions, I’ve advanced too much and another film comes out. There is supposed to be a click that signifies when to stop but I never hear/feel it.

Scan 2.jpg

After taking a few photos with this camera, I quickly learned that it doesn’t work. All my photos turned out black. This could be for a variety of reasons.

  1. The camera doesn’t work.

  2. Because the bellows don’t fully extend, light doesn’t travel through it properly and doesn’t produce a proper exposure.

  3. The shutter mechanism is defective. Its timing could be wildly off and contributes to an improper exposure.

  4. The film advance mechanism is doing something to not expose the film properly. Some films could be partially advanced which means that it’s partially exposed.

  5. The diaphragm or aperture is just too small, even at its widest, to actually let light in. I felt that this was the most plausible reason. I didn’t want to just say that the Jollylook just didn’t work. Maybe, there just wasn’t enough light in the particular room that I was in. To test this, I straight up took a picture of a light fixture. This would no doubt be enough light but guess what? I got nothing but the highlights of the lightbulbs. I tried again with another light fixture and essentially got the same result. To not get too deep into how a camera works, I’m just going to say that this camera needs A LOT of light. I’m talking about the brightest of summer days. If you try to take an indoor photo, it’s done. You won’t get anything but a black photo. Forget about the diaphragm guide or even changing it. You’re basically shooting yourself in the foot if you try to reduce the light by closing that diaphragm at all.

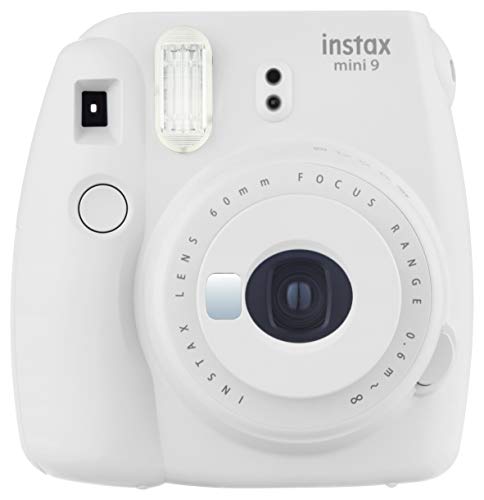
So, what more can I say? This is absolutely the worst, not just Instax, but camera, in general, that I’ve ever used. What’s crazy is that this thing is sold for $70. That’s not including film. On the other hand, something like the Fujifilm Instax Mini 9 costs around $50 and very often comes packaged with film. The Mini 9 is straight forward and gives you very consistent results.

Here’s something else for you. When I was contacted about reviewing this camera, the Co-founder of Jollylook gave me some background information about this camera. It was funded on Kickstarter in 2017 but since then, the company has had some financial problems. Instead of shipping these cameras out to the people who supported them on Kickstarter, Jollylook started selling the cameras. I would assume that this is to get some extra money to keep them afloat but apparently, two cameras need to be sold for every one Kickstarter reward fulfilled. Today, 2-3 years later and ONLY 65% of their backers have received their rewards. If you look at the Amazon reviews for this product, one person actually verified this. She said that she backed this project two years ago and still didn’t get it so she just ordered it on Amazon and got it two days later. I was even told that Jollylook is working on a new generation of Jollylook Square. I assume that this is just their version of a camera that uses Instax Square film. Just think about, instead of rewarding the people who backed this product through Kickstarter, they are out here selling these cameras, giving them away for free and even developing something different INSTEAD of giving their original supporters the rewards that they deserve. This just blows my mind.

To all those people who backed this Kickstarter and are still waiting to receive their camera, I really hope that you get it soon. But in all honesty, if what you’re getting is anything like what I got, I would just forget about it. This thing is trash. It’ll look pretty good as an expensive paperweight or shelf art, but as a camera, just buy a traditional Instax camera.


If you're considering buying any of the products mentioned, please support my work by using the links below.
Jollylook Mini Instant Camera https://amzn.to/38m1e0a
Fujifilm Instax Mini 9 https://amzn.to/38rDBTV


Want to support my work?

Consider visiting the shop and buying "Absolutely Nothing"
https://www.HaiHoangTran.com/shop/absolutely-nothing

or

Become a Patron!
https://www.patreon.com/HaiHoangTran

or

PayPal
https://www.PayPal.me/HaiHoangTran

or

Just shop on Amazon via this link!
https://amzn.to/2FgsDnG

WeatherTech Window Deflectors vs AVS Vent Visors for the Toyota Tacoma

I recently purchased the WeatherTech Window Deflectors for my 2020 Toyota Tacoma TRD Pro.

If you’re unfamiliar with this type of product, it goes by window deflectors, rain guards and vent visors. It just depends on what the manufacturers want to call them but all the products serve the same purpose.

There are two types of window deflectors: out-channel and in-channel. Out-channels almost always use adhesive tape to stick on the outer edge of a car’s window. In-channels sit in the channels of the windows and in between the weatherstripping. This is also typically done with adhesive tape but it just depends on the manufacturer’s design.

Now you if you’re wondering what the purpose of the window deflector is, well at the end of the day, it essentially provides a small canopy for your car windows. Imagine that it’s a rainy day and the inside of your windows are fogging up or you just want to get some fresh air. Well, if you open the window, rain is going to come splashing in. The window deflectors allow you to crack the windows while getting protection from the elements. On the opposite end of the spectrum, on a hot summer day, you may want to crack your windows but don’t want to chance someone coming by and messing with your car. Well, again, the window deflectors allow you to crack the windows and let air in while making it less obvious that the windows are cracked and make it harder for anyone to get their fingers in the crack. Aside from these functional uses, the window deflectors also serve as a way to accessorize a vehicle. I personally love the look of them and add them to all my vehicles.

Now, many different companies make window deflectors. In this case, we are taking a look at the WeatherTechs. To be honest, this is the first time that I’ve ever purchased window deflectors from WeatherTech. I’ve always avoided them because WeatherTech typically charges a lot for whatever product they sell. In the case of the window deflectors, the WeatherTechs are the most expensive that I’ve seen on the market. The official website lists them at $99.95 but realistically you have to pay for shipping and taxes so, for me, it comes out to $126.34. This could be 3 to 4, if not more, times more expensive than some of the competition. The most notable other brand for this type of product is going to be Auto Ventshade or AVS. I personally am a fan of AVS vent visors. I’ve had them on all of my other vehicles and to be honest, I wanted them on this Tacoma.

So why not buy the AVS? Well, I did. I bought them FIVE times and even tried to make a video dedicated to them but every time they arrived, there was something wrong with them. All of these window deflectors are basically made from plastic. Although they are very durable and don’t crack easily, they are prone to scratches. With AVS, they decided to package their product by stacking the deflectors on top of each other and shrink wrapping. It doesn’t help that they don’t take the time to round off the edges so some of the deflectors can be sharp. Because of all of this, the vent visors just end up damaging each other. Of the five sets that I purchased, all of them were damaged. The first set had obvious scratches everywhere. The same thing with the second set. By the third time, I said that I was going to install them no matter the damage. Again, they arrived damaged but I attempted to install them anyways. Well, that didn’t turn out too well because one of the deflectors had faulty adhesive tape that didn’t stick, so that set went back. The fourth set arrived and it was worse than all the others. I didn’t even have to remove the packaging and I can see obvious deep gouges everywhere. The fifth set came and like the fourth, it had deep gouges but this time, there were what looked like small pebbles under the shrink wrap. I was done with the AVS and ordered the WeatherTechs. Now, this isn’t just me. I’ll leave a link to the Amazon listing of the AVS vent visors and you can check out the reviews for yourself. There are so many bad reviews because people keep receiving damaged vent visors. It seems like the good conditioned ones are out there, but they are definitely not the norm. But hey, if you don’t mind some damage, you can get the AVS vent visors for a great price. Sometimes there’s a sale and you can pick a set up for around $30.

Again, I’ve never had WeatherTech window deflectors before and I wasn’t sure how they would fair. First of all, they don’t install with adhesive tape but are essentially held in place by the force of the deflectors themselves up front and with clips in the back. There are install videos on YouTube so you can check those out for yourself to understand what I’m talking about.

Prior to buying the WeatherTech window deflectors, there were a few things that I was wondering about and I wanted to go over them in case anybody else who’s interested in this product is wondering the same thing.

First, was the overall size. From images, it seemed like the WeatherTech window deflectors protruded out quite a bit. With AVS you had the choice of two types of vent visors, either the standard or low profile. The standard bubbles out from the window and is a bit more noticeable while the low profile is essentially flat and gives a more factory look as if it belonged on the truck. From pictures, the WeatherTechs seemed like they domed out more than the standard AVS. To my surprise, the WeatherTechs are pretty low profile. In the front, it has to bubble out a bit because of the design that they went with in order to install without adhesive, but the back is super low profile. It’s practically flushed. Up front, there is about one and a half fingers worth of space between the deflectors and the window glass. In the back, it’s pretty much just one finger. The design is very low profile and from my experience with the standard AVS vent visors for this truck, I would say that they are more low profile than those, in the rear for sure.

In terms of design, the WeatherTechs are very different from the AVS, at least up front. The WeatherTechs don’t just run along the top of the window channel but extend all the way down the front edge. With this, I was worried that there may be some visibility issues. I was worried that the deflectors would cover a good bit of the side mirrors. Again, I’m happy to say that this is not the case. On the driver side, there is no obstruction and with how my seat is positioned, the deflector only covers about one centimeter of the very top left most of the passenger side mirror. This is something that would not cause any hindrance at all.

Another thing that I was wondering about with these deflectors is if they increased wind noise. When driving, would wind get caught under the deflectors and add some unwanted noise. Again, I found that there was no such thing. Right after install, I had to drive about 30 miles on the freeway and didn’t notice any difference so that is great.

Finally, I was worried if the WeatherTechs would hinder the window’s ability to roll up. With the set of AVS that I tried to install, I noticed that while rolling the window up, it would often catch on the bottom edge of the deflectors. This is something many Amazon reviewers also mentioned. Some say that the problem went away. I didn’t have them long enough to find out. However, with the WeatherTechs, because the deflectors extend all the way down the front and actually sit outside the window channel, the window is able to roll up and down freely.

At the end of the day and in my opinion, the WeatherTech window deflector is a better product than the AVS vent visors. Is it worth the almost $130 price tag? That’s hard to say and ultimately for you to decide. I myself lean towards no, they are not. If you’re looking for something cheap and functional, try the AVS first. You may get a damaged product but hey, it’s cheap and it works. I didn’t want to pay brand new prices for damaged goods so the AVS were out of the question. I went with the most trusted and expensive option and I would have to say that I’m happy with them.


Auto Ventshade 194768 https://amzn.to/2RqXNyp
Auto Ventshade 994036 Low Profile https://amzn.to/3669HD7
Auto Ventshade 1774036 Low Profile Matte Black Ventvisor https://amzn.to/364rqL1


Want to support my work?

Consider visiting the shop and buying "Absolutely Nothing"
https://www.HaiHoangTran.com/shop/absolutely-nothing

or

Become a Patron!
https://www.patreon.com/HaiHoangTran

or

PayPal
https://www.PayPal.me/HaiHoangTran

or

Just shop on Amazon via this link!
https://amzn.to/2FgsDnG

First Problem with the 2020 Toyota Tacoma TRD Pro

It’s official! The TRD Pro has its first issue and it involves tail light condensation.

Since buying this truck, I’ve noticed that the tail lights would periodically have some condensation form in the housing. At first, I didn’t think that it was that big of a deal. I’ve noticed that condensation is something that happens with a lot of newer vehicles. Maybe it’s because of cost-cutting or quality control, but it is a problem that does come up. But as we get deeper into winter and we get more and more rain, this condensation problem has become more apparent.

If you didn’t know, the Toyota Tacoma’s tail lights have vents in them. This just means that there’s a hole that allows for air to travel between the tail light housing and the outside world. Ideally, this would mean that the air inside the tail light housing would be able to mix and balance out with ambient conditions. That is, IF the vented design works.

IMG_2219.JPG

Well, after about 3 days of straight rain, I went outside to do some work and was greeted by a set of tail lights filled with condensation. Now, it’s gotten to a point where I’m a bit concerned. This is, no doubt, the most condensation that I’ve ever had in the lights of any one of my vehicles.

Seeing this, I immediately took some pictures and sent it to the dealership where I purchased the truck. The dealership thought that this was abnormal so they wanted me to bring the truck in for a more thorough evaluation. I made an appointment for the next opening, which was the following morning.

Taking the truck in, a technician looked at the truck and immediately thought that something was wrong because there was noticeable water along the seals of my tail lights. Even though the technician believed that something was wrong, they still needed to take the truck to the back, remove the tail lights and take some pictures to send to a corporate representative. Corporate needed to approve the warranty claim before anything could be done. Realistically, even though the dealership approved the claim, corporate can still deny it. Luckily for me, my claim was approved. Now, all there was left to do is order in some new tail lights and get them installed in the Pro. This is where I ran into the only hiccup of this process. My new tail lights were on backorder. This is interesting because the tail lights are specific to the 2020 TRD Pro. You would think that Toyota would have them available. Maybe there is a widespread problem with them and Toyota is warrantying them like crazy. Who knows. Eventually, the tail lights arrived and they were installed. Luckily for me, this entire process went smoothly.

After talking to the technicians at my dealership, it is my understanding that some condensation is going to be normal. Again, there really shouldn’t be any if the tail light vents work properly but I guess it’s just a poor design. So the question is, how much condensation is too much and how much warrants getting the lights warrantied? Well, there’s no clear cut answer there. Ultimately, you just have to bring the truck in and let the dealership look at the lights. They will make the final decision. Unfortunately, this means that the consumer is at the mercy of what Toyota decides. You may have condensation in your tail lights and believe that it’s too much, but Toyota may say otherwise. My only advice is that if a dealership denies your claim and you really believe there is an issue, get a second opinion. Go to another Toyota dealership and have them check it out. Who knows, one of them might approve your claim.

During this process, I talked to other Tacoma owners to get their input on the situation. Because it’s the internet, the answers were varied. Some people have condensation while others don’t. I would say that if you are concerned, just take it into the dealership and have them check it out. Don’t forget to get some photos and video as proof to help your case.

It should also be noted that this is not an issue that’s only associated with the tail lights. This could be a problem with any of the lights on the vehicle. Be mindful of this and periodically examine your vehicle.

I’ve included a gallery of what my tail lights look like at it’s worse. Compare them to your tail lights and act accordingly.


Want to support my work?

Consider visiting the shop and buying "Absolutely Nothing"
https://www.HaiHoangTran.com/shop/absolutely-nothing

or

Become a Patron!
https://www.patreon.com/HaiHoangTran

or

PayPal
https://www.PayPal.me/HaiHoangTran

or

Just shop on Amazon via this link!
https://amzn.to/2FgsDnG

2020 Toyota Tacoma TRD Pro


I recently purchased the 2020 Toyota Tacoma TRD Pro and for this post, we will be looking at some of the major updates of the 2020 TRD Pro vs the 2019 TRD Pro. This post will be most helpful to those who have a general understanding of the trim in the first place.

C0125.jpg

Let’s first start with the exterior. For my personally truck, I went with the Super White finish. Toyota has been releasing exclusive colors for its TRD Pro line of vehicles and this year’s is Army Green. I actually had the chance to pick between this Super White and two other Army Greens but went with this because it’s my favorite. To me, the Army Green is nice but it’s nice for now. It’s not a color that I can see myself liking years down the road. I’d rather go with a neutral color and I did. I’m happy that I went with Super White. One thing to note about the Army Green finish is that it is currently only available for the various TRD Pro vehicles and Toyota tends to release the special colors for other trims later in the life cycle. It’s also been said that these special colors hold their value better than other colors so if this is something that interests you, Army Green may be the way to go for this year.

In terms of aesthetics, the exterior of the new 2020 Tacoma is largely the same as the 2019 and other 3rd gens. The shape of the body is the same but we’ve been getting minor upgrades to go with it every year. Five years into the cycle and I have to say, the Tacoma is really starting to look like a complete package. It’s just unfortunate that many of the advertised upgrades of the 2020 Tacomas are optional. The only trim that comes with everything that’s new as standard is the TRD Pro.

C0149.jpg

One of the big exterior upgrades for this year is the new LED headlight with sequential LED turn signal indicators. It is mind-boggling that in 2019, the Tacoma still has halogen headlights and realistically even in 2020. Although these headlights are a nice addition, they are only standard on the TRD Pro. On other trims, it’s about a $500 upgrade but can be packaged with other things for better savings. Because they were so heavily advertised, you would think that the new LED headlights are standard but guess again.

C0118.jpg

In terms of the rear taillights, it’s pretty much the same except for this year, it has darker interior accents compared to previous years. This is minor but I appreciate it because it really adds to the aesthetics of the truck, especially with the Super White where there is a black and white theme.

The next upgrade is going to come from the wheels. At a quick glance, the 2019 and 2020 TRD Pro wheels do look very similar but the 2020s come with some subtle refinements. In general, the spokes look skinnier because Toyota added some extra cutouts and negative space. The wheel is now also more matte as compared to the shiny finish of the 2019. These minor changes do add up. I personally think that the 2020 wheels look much better than the 2019 and is probably the best looking factory Tacoma wheels ever. For stock rims, these are very acceptable and attractive. Aside from looks, there are some benefits to these new rims. They are now 4.2 lbs lighter per wheel. This equates to 16.8 lbs total for the set. This isn’t a huge difference, but any weight reduction is welcomed in my opinion. This means that there is less that the truck has to haul around, less wear and tear and this will very incrementally help with fuel economy in the long run.

C0120.jpg

The final upgrade that we’re going to look at in terms of the exterior is the Smart Key. With the Tacoma, if the key fob comes in close proximity to the door, the door actually detects the key fob and allows you to lock/unlock the door without needing to press the buttons of the key fob. Just reach for the handle and the door unlocks. Press the striped lines on the handle and the door locks. This was previously only attached to the driver's door. With the 2020, this extends to the passenger door. This just makes this feature more encompassing and useful. I actually appreciate this because I do find myself reaching for the passenger door of the 2019 only to forget that it won’t automatically unlock and I have to find the key fob.

C0123.jpg

Moving on to the interior, we get some additional welcomed upgrades. One thing that people have been asking for, for a long time, is the power-adjustable seats. The driver side gets 10 way adjustable with 2 way lumbar support while the passenger is still fully manual. This is another one of those mind-boggling things about the Tacomas. For the price that you pay for these trucks, even in 2019, the only option you have is manually adjustable seats so the addition here is greatly appreciated. I’ve heard a few people even say that they couldn’t stand driving pre-2020 Tacomas simply because they couldn’t get the seat into a comfortable position. Hopefully, this new power seat will be able to help some of those people.

C0155.jpg

Another upgrade is going to be to the new 8-inch infotainment system. The unit itself is different in design from the 2019 and is more in line with other newer Toyotas. With this unit, we have a lot more raised physical buttons vs the flat/flushed buttons of the past. The aesthetics may be different but the firmware and user experience are pretty much the same. This system still runs off Toyota’s Entune and that hasn’t changed all that much through the years. To me, this isn’t the best looking UI out there and it’s time for Toyota to update the entire system if they want to keep up with the competition. It’s just a good thing that Toyota FINALLY added Apple CarPlay and Android Auto to this system so we can connect our phones and get something that’s much more pleasing to look at and more intuitive to use. I’m an iPhone user so I can only account for Apply CarPlay. Again, this is one of those things that’s hard to believe that it took this long for us to get. It should be noted that although CarPlay is a nice addition, it still requires a wired connection. To me, this is counter-intuitive because the Tacoma comes with a wireless Qi charging mat. So, you can charge your phone wirelessly but if you want to connect it to CarPlay, you have to use a cable. It just seems redundant and unnecessary. Wireless CarPlay is something that Toyota already employs in other vehicles and for the price of the TRD Pro, they really should’ve included it.

C0160.jpg

Lastly, with the interior, the 2020 TRD Pro comes with newly designed floor mats. They probably perform about the same as in previous years, but these new mats do look a lot better.

C0158.jpg

Next, let’s talk about some of the upgraded technology that comes with the 2020 TRD Pro. A highly advertised feature is the new Multi-Terrain Monitor. This comes with a front-facing camera and more cameras on either side view mirror. These cameras are used in conjunction with the rear camera to create a 360-degree bird’s eye view of the Tacoma. This is useful for an offroader because it allows you to see completely around the vehicle and can help you navigate around obstacles without getting hung up. When on road, this feature can be very useful when moving around parking lots or tight spaces like a garage. This is an extremely useful feature but the downside is that Toyota didn’t make the effort to upgrade the cameras and screen to provide higher resolution. You can make things out but don’t expect to get a sharp video feed. Also, if you get a Tacoma with this system, make sure to use and get used to it because I find that there is some distortion and the way that your surrounding is displayed can be misleading. For example, the screen may show that you’re right on top of an object, but it’s really a foot away. Again, get used to the system and understand how it works or you may cause some damage to the truck.

2020 Toyota Tacoma TRD Pro | Major Upgrades. .jpg

Another new feature for the 2020 TRD Pro is the inclusion of Toyota Remote Connect and other Connected Services. Remote Connect is Toyota’s auto-start system with mobile app integration. This allows you to start/stop the Tacoma from the smart key fob without actually being in the vehicle by pressing the lock button 3 times. On a cold winter day, this is going to be an extremely welcomed feature. If you don’t have the key fob around, you’ll still be able to access these features with the mobile app. You can start/stop the truck, lock/unlock the doors and even track the vehicle’s location. If someone happens to steal your truck, the likelihood of retrieving it is going to be so much higher. Of all the 2020 upgrades, this may be my favorite. The only bad thing about this is that it is actually a subscription service. The truck comes with a 1-year trial, but after that, the service costs $80 a year or $8 a month. That’s a huge bummer considering that aftermarket options cost about $400 and is a one time cost.

2020 Toyota Tacoma TRD Pro | Major Upgrades.jpg


Want to support my work?

Consider visiting the shop and buying "Absolutely Nothing"
https://www.HaiHoangTran.com/shop/absolutely-nothing

or

Become a Patron!
https://www.patreon.com/HaiHoangTran

or

PayPal
https://www.PayPal.me/HaiHoangTran

or

Just shop on Amazon via this link!
https://amzn.to/2FgsDnG

Fold-a-Cover G4 Elite for 3rd gen Toyota Tacoma 2016-2020


C0070.jpg

After a lot of research, I’ve finally decided on a tonneau cover for the Tacoma. The one that I went with is the Fold-a-Cover G4 Elite.

For those who have never seen this product before, the G4 Elite is essentially a hard folding tonneau cover but there are a few things that make this one stand out. First, this cover features a four-panel design. Many of the other hard folding covers on the market only feature three panels. Having four panels mean that each individual panel can be smaller and when everything is folded up, the cover takes up less space and allows for more usable bed space.

This cover also allows for the ability to access the truck bed without needing to lower the tailgate. On the front and rear panels of the cover are latch release handles. Just lift these and the panel comes right up. This is an extremely useful feature and is one of the main reasons why I purchased this cover.

C0072.jpg

Another useful feature of this cover is the ability to lock it independently from the truck. On the front and rear panels are covers that reveal a lock. Use the keys that come with the cover and you’ll be able to lock this cover in place. This in combination with a locking tailgate will provide you with a pretty safe place to store your things.

The last big thing that I’d like to point out with this cover is that it uses what Fold-a-Cover calls the wind seals. These are essentially two plastic strips that run along the entire bed rails. When unfolded, the panels actually sit in between the wind seals rather than directly on top of the bed rails like many other tonneau covers. The wind seals have weather stripping both where the panels sit and where they meet with the bed rails. Fold-a-Cover doesn’t explain why they took this approach but the way that I see it, because there is one solid weatherstrip with the blade seals, this design theoretically can provide better weather resistance. With other covers that fold and sit directly on the bed rails, there are typically cuts wherever the panels fold so that it can more easily articulate. In theory, these cuts make a break-in the weather stripping and can allow water to slip in. Overall, I would have to say that the G4 Elite’s design has worked so far because I haven’t seen any water seeping in from the sides of the cover.

C0083.jpg

And that, in a nutshell, is the G4 Elite from Fold-a-Cover. I’ve only owned this cover for a short time so I can’t attest for its long term durability. However, in my time with the cover, I’ve noticed a few things that I’d like to share with those who are interested in picking this product up.


IMG_1757.JPG

Let’s get started with my first impressions of the G4 Elite. Well, let’s just say it wasn’t very good. The shipping box arrived ripped up with the staples that held it together torn apart so it was only staying together by the wires that wrapped around the entire box. Going inside, everything was still there but the cover itself was slightly damaged. There were a lot of small paint chips and scratches on the cover. I don’t think that this is a result of shipping. Sure, the smaller parts could’ve moved around and rubbed against the cover, but I think most of the damage was there before the cover even left the factory. Some of the damage definitely looks like it was from mishandling while others just look like a bad paint job. My overall first impressions were not great. For something that MSRP for $960, I’m not impressed. Had it not been the beginning of the rainy season and I needed a cover ASAP, I would’ve sent this thing back. And a word to the wise, if you are a stickler for a flawless product, do not install the cover right away. Make sure that you thoroughly inspect it because once installed, Fold-a-Cover will not take it back. I contacted Fold-a-Cover about this issue and the best they could do is send me some touch-up paint so that I can fix the damaged areas because that’s exactly what I wanted to do with a brand new bed cover that I spent almost a grand on (sarcasm).

C0091.jpg

Next, let’s move on to the install. I installed the G4 Elite on a 2019 Toyota Tacoma Double Cab Long Bed. There are various versions of this cover that will fit 2nd and 3rd gen. Tacomas, but I can only speak for my 2019 model. Let me just say right off the bat that this is the hardest bed cover that I’ve ever had to install. That’s not to say that the directions are overly hard to follow or the install itself is very difficult, but relatively speaking, it is much harder to install this cover than others and it definitely took the most time to do so. With other covers, there are a few brackets to install, put the cover on and you’re pretty much good to go. With the G4 Elite, there’s a lot of minor things to adjust and a lot of going back and forth to make sure that once you lock one thing down, the other side doesn’t move and is still good. There’s a lot of finagling with this cover and that can be quite annoying but again, the install is still manageable. However, there are a few things that I’d like to point out about the install process. This section is really only helpful for those doing the install. I’m not giving you a step by step but if you’re going through the directions, you should know exactly what I’m talking about.

IMG_1761.JPG

One thing that was really throwing my install off was the front blade seal. This is essentially a weatherstrip that helps to prevent water from coming into the truck bed. The problem with this is that it is too long on the sides. The weatherstrip actually wedged itself against the front edge of the wind seal and does not allow the front panel to close.

Examine the included image. The blade seal (red) is too long and wedged itself against the wind seal’s endcap (green) and doesn’t allow the front panel (blue) to close properly. This leaves a gap that allows water to enter the truck bed.

To fix this, I trimmed off a small piece of the blade seal with a razor blade, just enough to allow it to clear the wind seal’s endcap.

Earlier I mentioned that one of the reasons why this cover is harder to install is because it requires a lot of adjustments. One of those things that took me a while to finalize is the rotary latch. With this, there are three things to consider: the latch’s position, the striker bolt’s position, and the latch’s timing. The latch and striker bolt have to be positioned so that the latch can catch the striker bolt and properly close the cover. If the latch is too far forward/backward, the striker bolt won’t engage the closing mechanism. The same goes if the striker bolt is too high/low. The panel may close but it won’t seat properly and may leave a gap in the wind seal. With the latch’s timing, this refers to the opening of the left and right rotary latch, relative to each other. If the timing is off, you’ll distinctly hear the latches open one after the other instead of in unison. This adjustment is fairly straightforward but took me a long time because I was really trying to get the two latches to sync up. The adjustment is done by tightening/loosening a few nuts which adjust a cable on the end panels. If you lift the latch release handle VERY slowly, you’ll be able to hear the individual rotary latches release one after the other. By doing this, you’ll be able to figure out which latch is releasing first, but it is still very difficult to adjust it so that they release at the same time. It is possible but difficult because there is such a fine line between one latch opening first or the other. Again it is possible to get them synced, but I’ve found that once you go to tighten the cable end jam nut, the cable slightly shifts and the timing is out of sync again. I would recommend that you don’t focus too much on the slow latch release method. Instead, lift the latch handle release like you normally would. With a smooth motion, the latches will release so quick that the timing will be indistinguishable. That is if you get the timing relatively close in the first place.

C0081.jpg

The thing that took me the longest time to finalize was the position of the wind seals. These were difficult to adjust because they are largely locked into place and there isn’t much room for adjustment. They are held in place by brackets that bolt into the bed frame and rails. Fairly straightforward but I’ve found that being just a tiny bit off with its placement will prevent your cover from closing properly. If you look at the brackets that hold the wind seal in place, you see that most of them are held in place by a bolt going through a hole so their position is largely set to one place. The only elongated holes are used on the brackets that mount the wind seals on to the bed. The elongated holes theoretically allow you to move the wind seals from side to side to allow the cover’s panels to fit in between. For me, the front of the wind seal kept on coming in too close against the cover so it wouldn’t close and latch properly. Even pulling the wind seal out to its maximum position didn’t help. Whenever I would tighten the bolts that held the wind seal in place, it would pull the wind seal towards the cover panel and that’s no good. I ended up shimming a few flat washers under the bracket that held the wind seal in place so that it sits higher. This way when the bolts get tightened, there’s relatively little movement from the wind seal. With other bed covers, they typically have weatherstripping along the entire edge of the cover panels and once the cover is closed, that weather-stripping compresses and prevents water from coming in. Because the Fold-a-Cover utilizes the wind seals, you have to worry about 2 extra parts that I feel just overcomplicates the install process. The panel compresses against the wind seal’s weatherstripping, then the wind seal itself compresses against the bed cap. The install would go so much more smoothly if Fold-a-Cover just does away with the wind seal completely and mount the cover directly to the bed caps.


C0091 .jpg

Now, let’s just talk about everyday use and the practicality of this cover. One of my main reasons for getting a bed cover is to keep the contents of the truck bed dry. That being said, no cover is going to be waterproof or keep 100% of the water out. Most manufacturers, including Fold-a-Cover, will say this about their covers.

C0086.jpg

It’s rainy season here in Washington and this cover has been seeing a lot of rain. So far, the G4 Elite seems to be able to keep out a good amount of rain. I haven’t seen any penetration from the sides. The only places that get some water are the corners but this is to be expected. The Tacoma’s bed itself isn’t very well sealed. There are some noticeable gaps in the corners and I’m sure this is where water is coming in from. So, water getting in the bed is not so much the cover’s fault but the Tacoma. One thing that you can do to help reduce this problem is to get some truck bed weather-stripping/seals and just stick them in those gaps at the corners. 

C0077.jpg

Another thing on the wetness, prior to purchasing this cover, I saw a few reviews that mentioned that the locks would freeze up in winter and become unusable. When I got my G4 Elite, I found this hard to believe because the locks have some pretty robust covers that seemed to seal pretty well and actually takes some effort to open. Unfortunately, it didn’t take long for me to realize that those reviews were actually correct. Either the cover doesn’t seal that great or there’s some other factor involved because there always seems to be water and condensation under the cover. Of course, in winter this will result in the locks freezing up.

C0093.jpg

I’ve also noticed something similar happening to the latch release handle and the entire lock housing. After a rainstorm, if I were to open the panels where the latches are, there will be noticeable amounts of water draining from the latch housing. This would mean that water is seeping in from the latch handle itself. Again, there’s a good chance that this can freeze up in the winter, making the cover completely unusable. With the amount of water that gets into this housing, I’m really interested in seeing how long it will last. Only time will tell.

Another problem that I have with this cover is the blade seals. I think that they are too short in width, especially on the tailgate where it is barely and unevenly distributed. You would think that I can just pull the entire cover slightly back but I can’t. Remember, the cover’s placement is largely set because it’s bolted into place with little adjustment available. Fold-a-Cover just needs to include a longer blade seal on these covers.


C0090.jpg

Overall, I would say that the Fold-a-Cover G4 Elite works pretty well after you get it installed. It looks good and largely functions as advertised. It’s just the amount of water that gets under the lock cover and lock assembly that’s kind of concerning. If you live in a relatively dry location with little precipitation and freezing temperatures, I think that this is a good option.


Want to support my work?

Consider visiting the shop and buying "Absolutely Nothing"
https://www.HaiHoangTran.com/shop/absolutely-nothing

or

Become a Patron!
https://www.patreon.com/HaiHoangTran

or

PayPal
https://www.PayPal.me/HaiHoangTran